Venora's Vintage

  • Home
  • Recipes
  • Loves
    • Kitchen
    • Blogroll
  • Resources
    • Forum
    • Pyrex
  • About

My Best Recipe: Winning Recipes from the Honolulu Advertiser

May 20, 2017 by V in Cookbook Review

There are so many lifestyle cookbooks these days. French Laundry, Bouchon and Flour+Water...beautiful to peruse...but would I ever making anything from it? Probably not. Too time consuming. Too mason jar-reclaimed-wood-this-is-actually-really-expensive chic for me. I like things a bit more real. I know "curated everything" is all the rage recently and I prefer kitschy where things are thrown together with no rhyme, but makes proper sense to the person who lives it. 

After spending my last semester of law school at UH-Manoa, I came back to Minnesota for law school graduation. In hindsight, I should have just stayed there and studied for the bar exam remotely. I missed Hawaii so much when I went home that I went on an Amazon splurge and bought tons of Hawaiian cookbooks. One of my favorites has always been this great cookbook compiled by the Honolulu Advertiser from 1991. The book is so adorable. It has photos of everyone and their dish along with a little tidbit about who they are and what they like to do. 

Flipping through this cookbook always reminds me of a high school yearbook for everyone who has shared a recipe seems like a friend. What is their story after being captured in a moment in time by the Honolulu Advertiser? I turn back to several people who have captivated my attention - I've made Carolyn's recipe several times (but I omit the nuts) and have Melissa's and Carol's flagged... one day I'll get to it!

Carolyn Carvalho's Fluffy Banana Bread

Carolyn Carvalho's Fluffy Banana Bread

Melissa Gionet's Tucson Lemon Cake

Melissa Gionet's Tucson Lemon Cake

Carol Bank's Mom's Korean Somen 

Carol Bank's Mom's Korean Somen 

Fast forward to now....we are twenty some years later, the book gets shipped to Minnesota, I read it periodically when I miss Hawaii and think about what happened to everyone in this 1991 cookbook? I hope they're still cooking!


Carolyn Carvalho's Fluffy Banana Bread

1/2 cup butter
1 cup sugar
2 eggs
1 tsp vanilla
1 2/3 cups flour
1 tsp baking soda
1/2 tsp salt
1 cup mashed bananas
1/2 cup sour cream
1/2 cup chopped nuts

In a large bowl cream butter, sugar and vanilla well. Add eggs one at a time and beat well until fluffy.

Sift dry ingredients and add them alternately with the bananas and sour cream to the butter mixture, small amounts at a time. End with the dry ingredients and mix gently. Add nuts. Bake at 350 degrees for 1 hour.

May 20, 2017 /V
Hawaii, Cookbooks
Cookbook Review
2 Comments
grapeleaves

Defrosting the Summer in February

February 28, 2017 by V in Weekend Meals

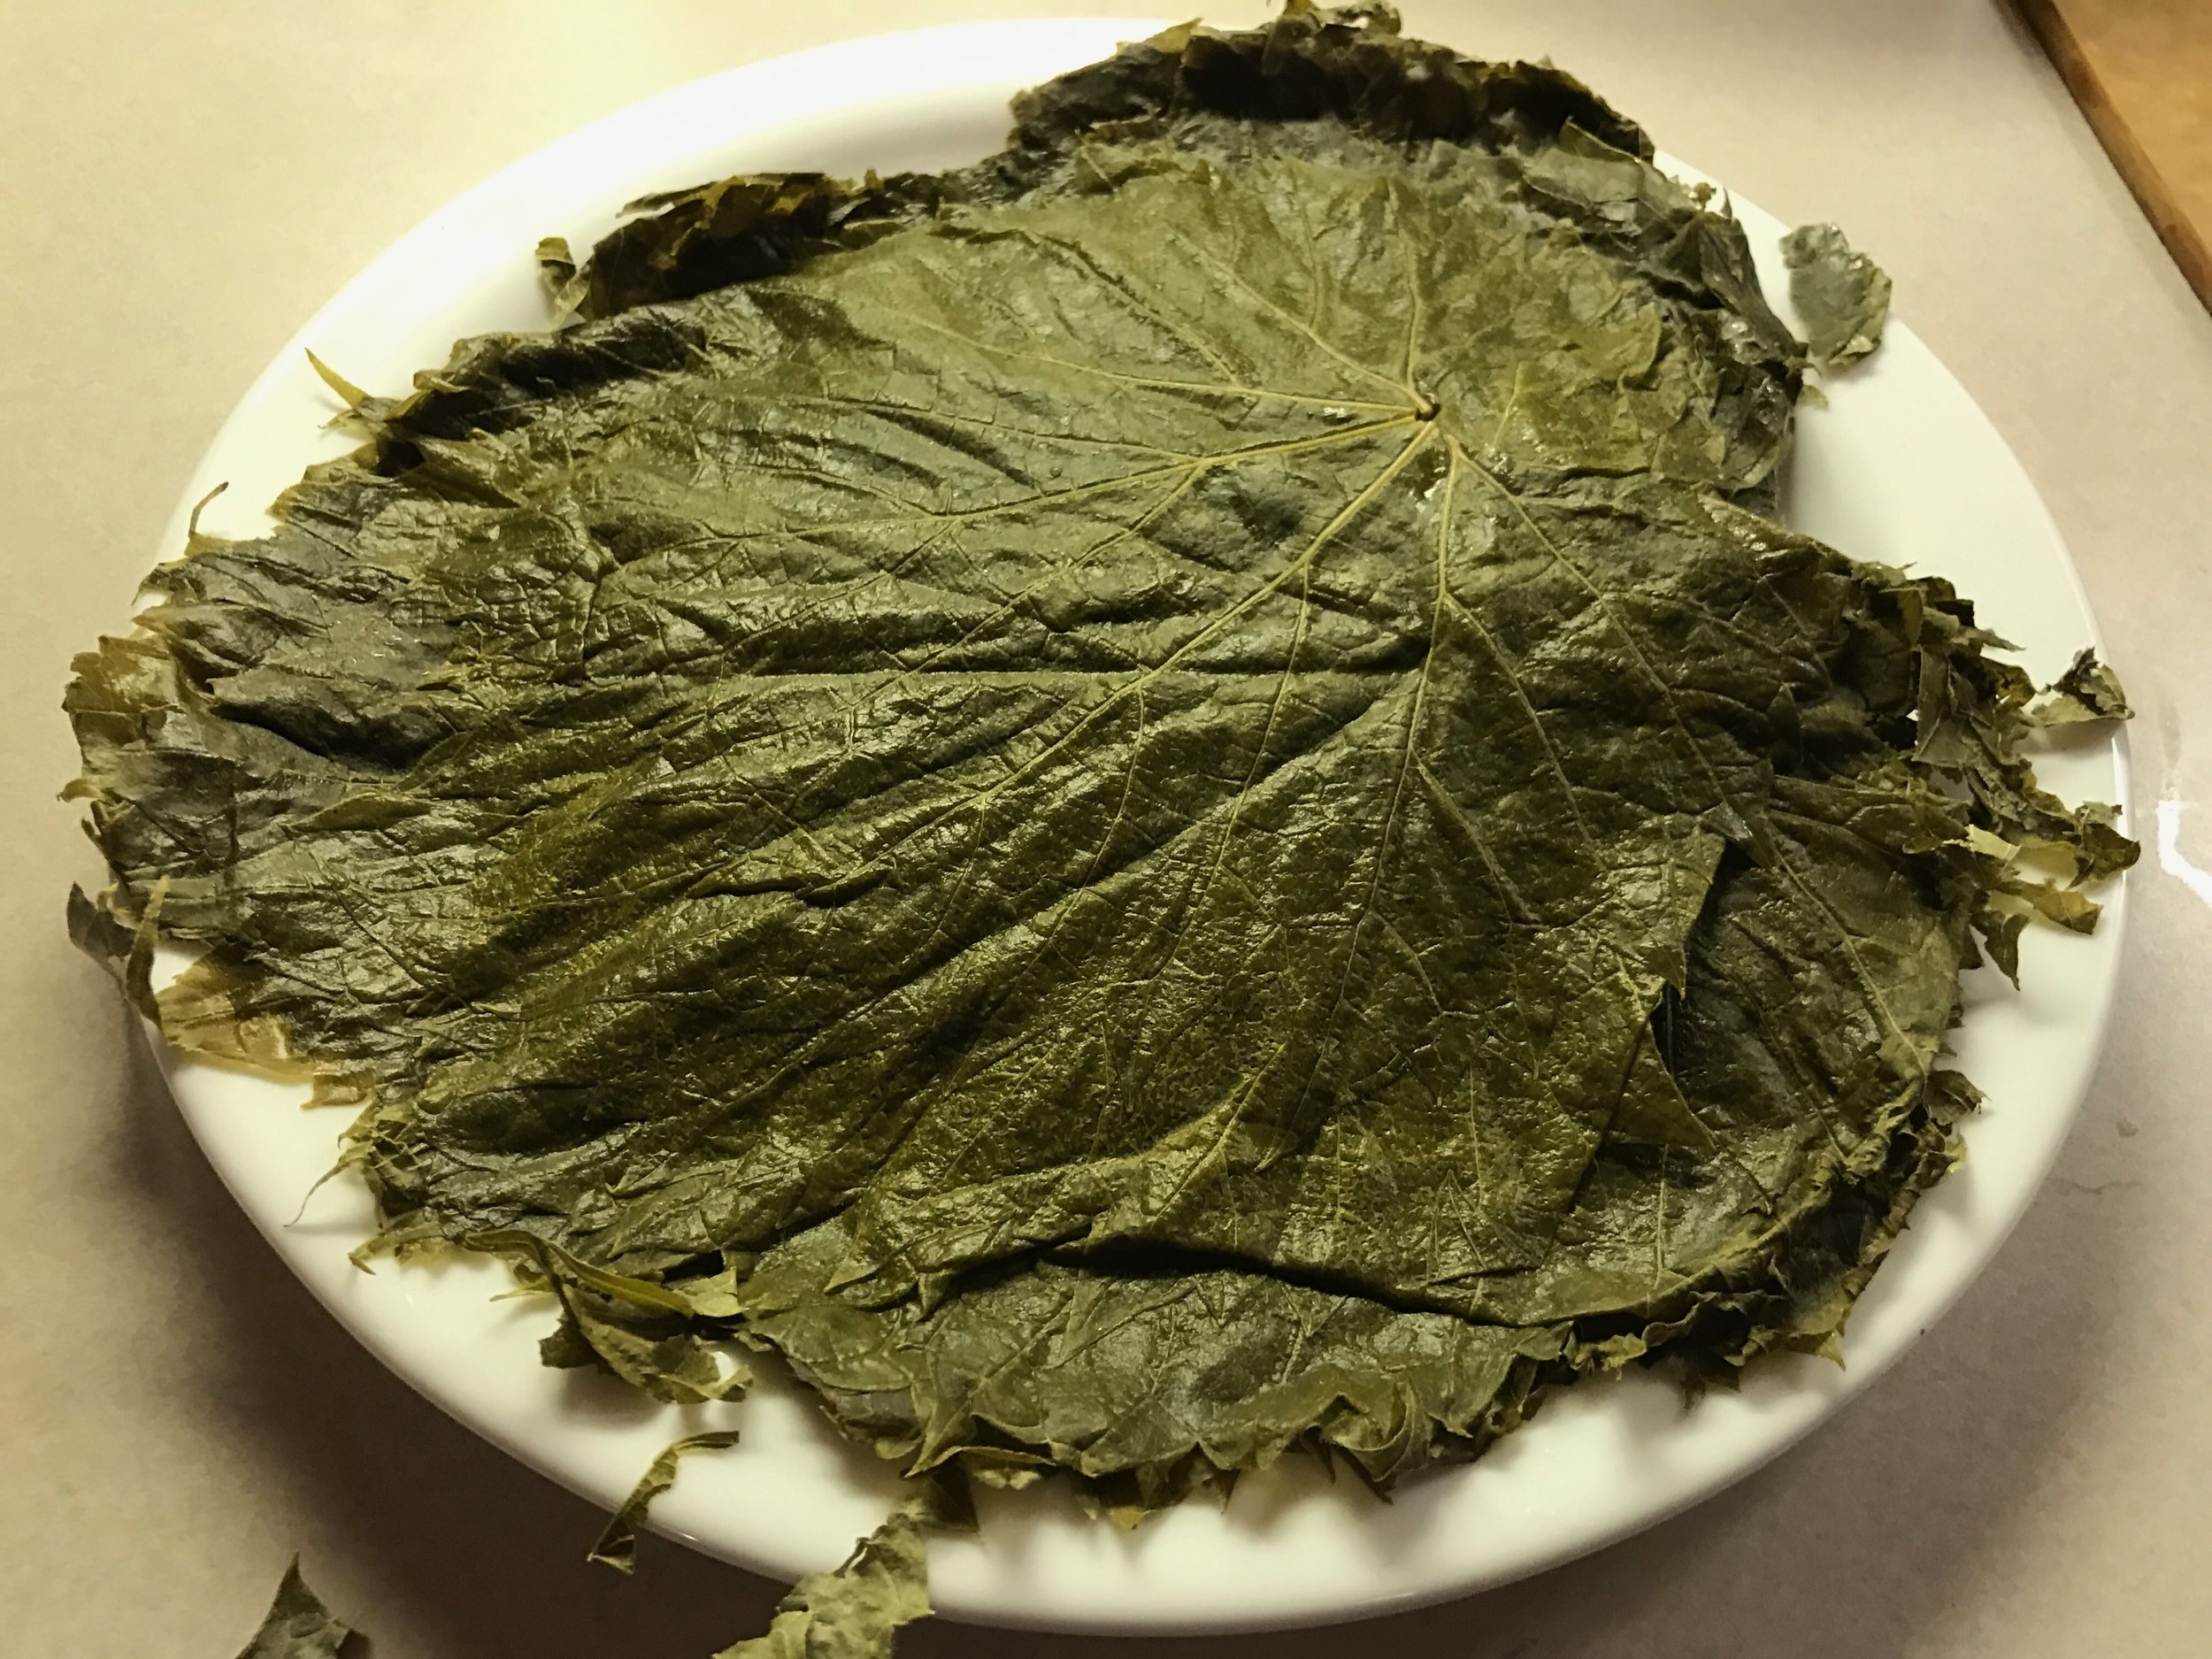
In February, I found a bag of frozen grape leaves that I had carefully packaged in the previous summer. I found the leaves along the river in St. Anthony Main Park during a weekend when it was still hot outside in Minneapolis and though I wanted to start making stuffed grape leaves right away, I knew immediately I should spend the nice day outdoors rather than inside; for I'd regret it come winter. That evening, after the sun set, I cut all the stems off the leaves and blanched them. After they were cool to touch, I laid them, one on top of the other, on a flat plate. Then I tucked them into a zip lock bag and shoved them in the freezer, albeit a bit recklessly, until this past Sunday when I gently removed them from the freezer while praying that I didn't damage them from all the fumbling during the last season of eating. After the leaves defrosted, they were miraculously still in tact. Phew.

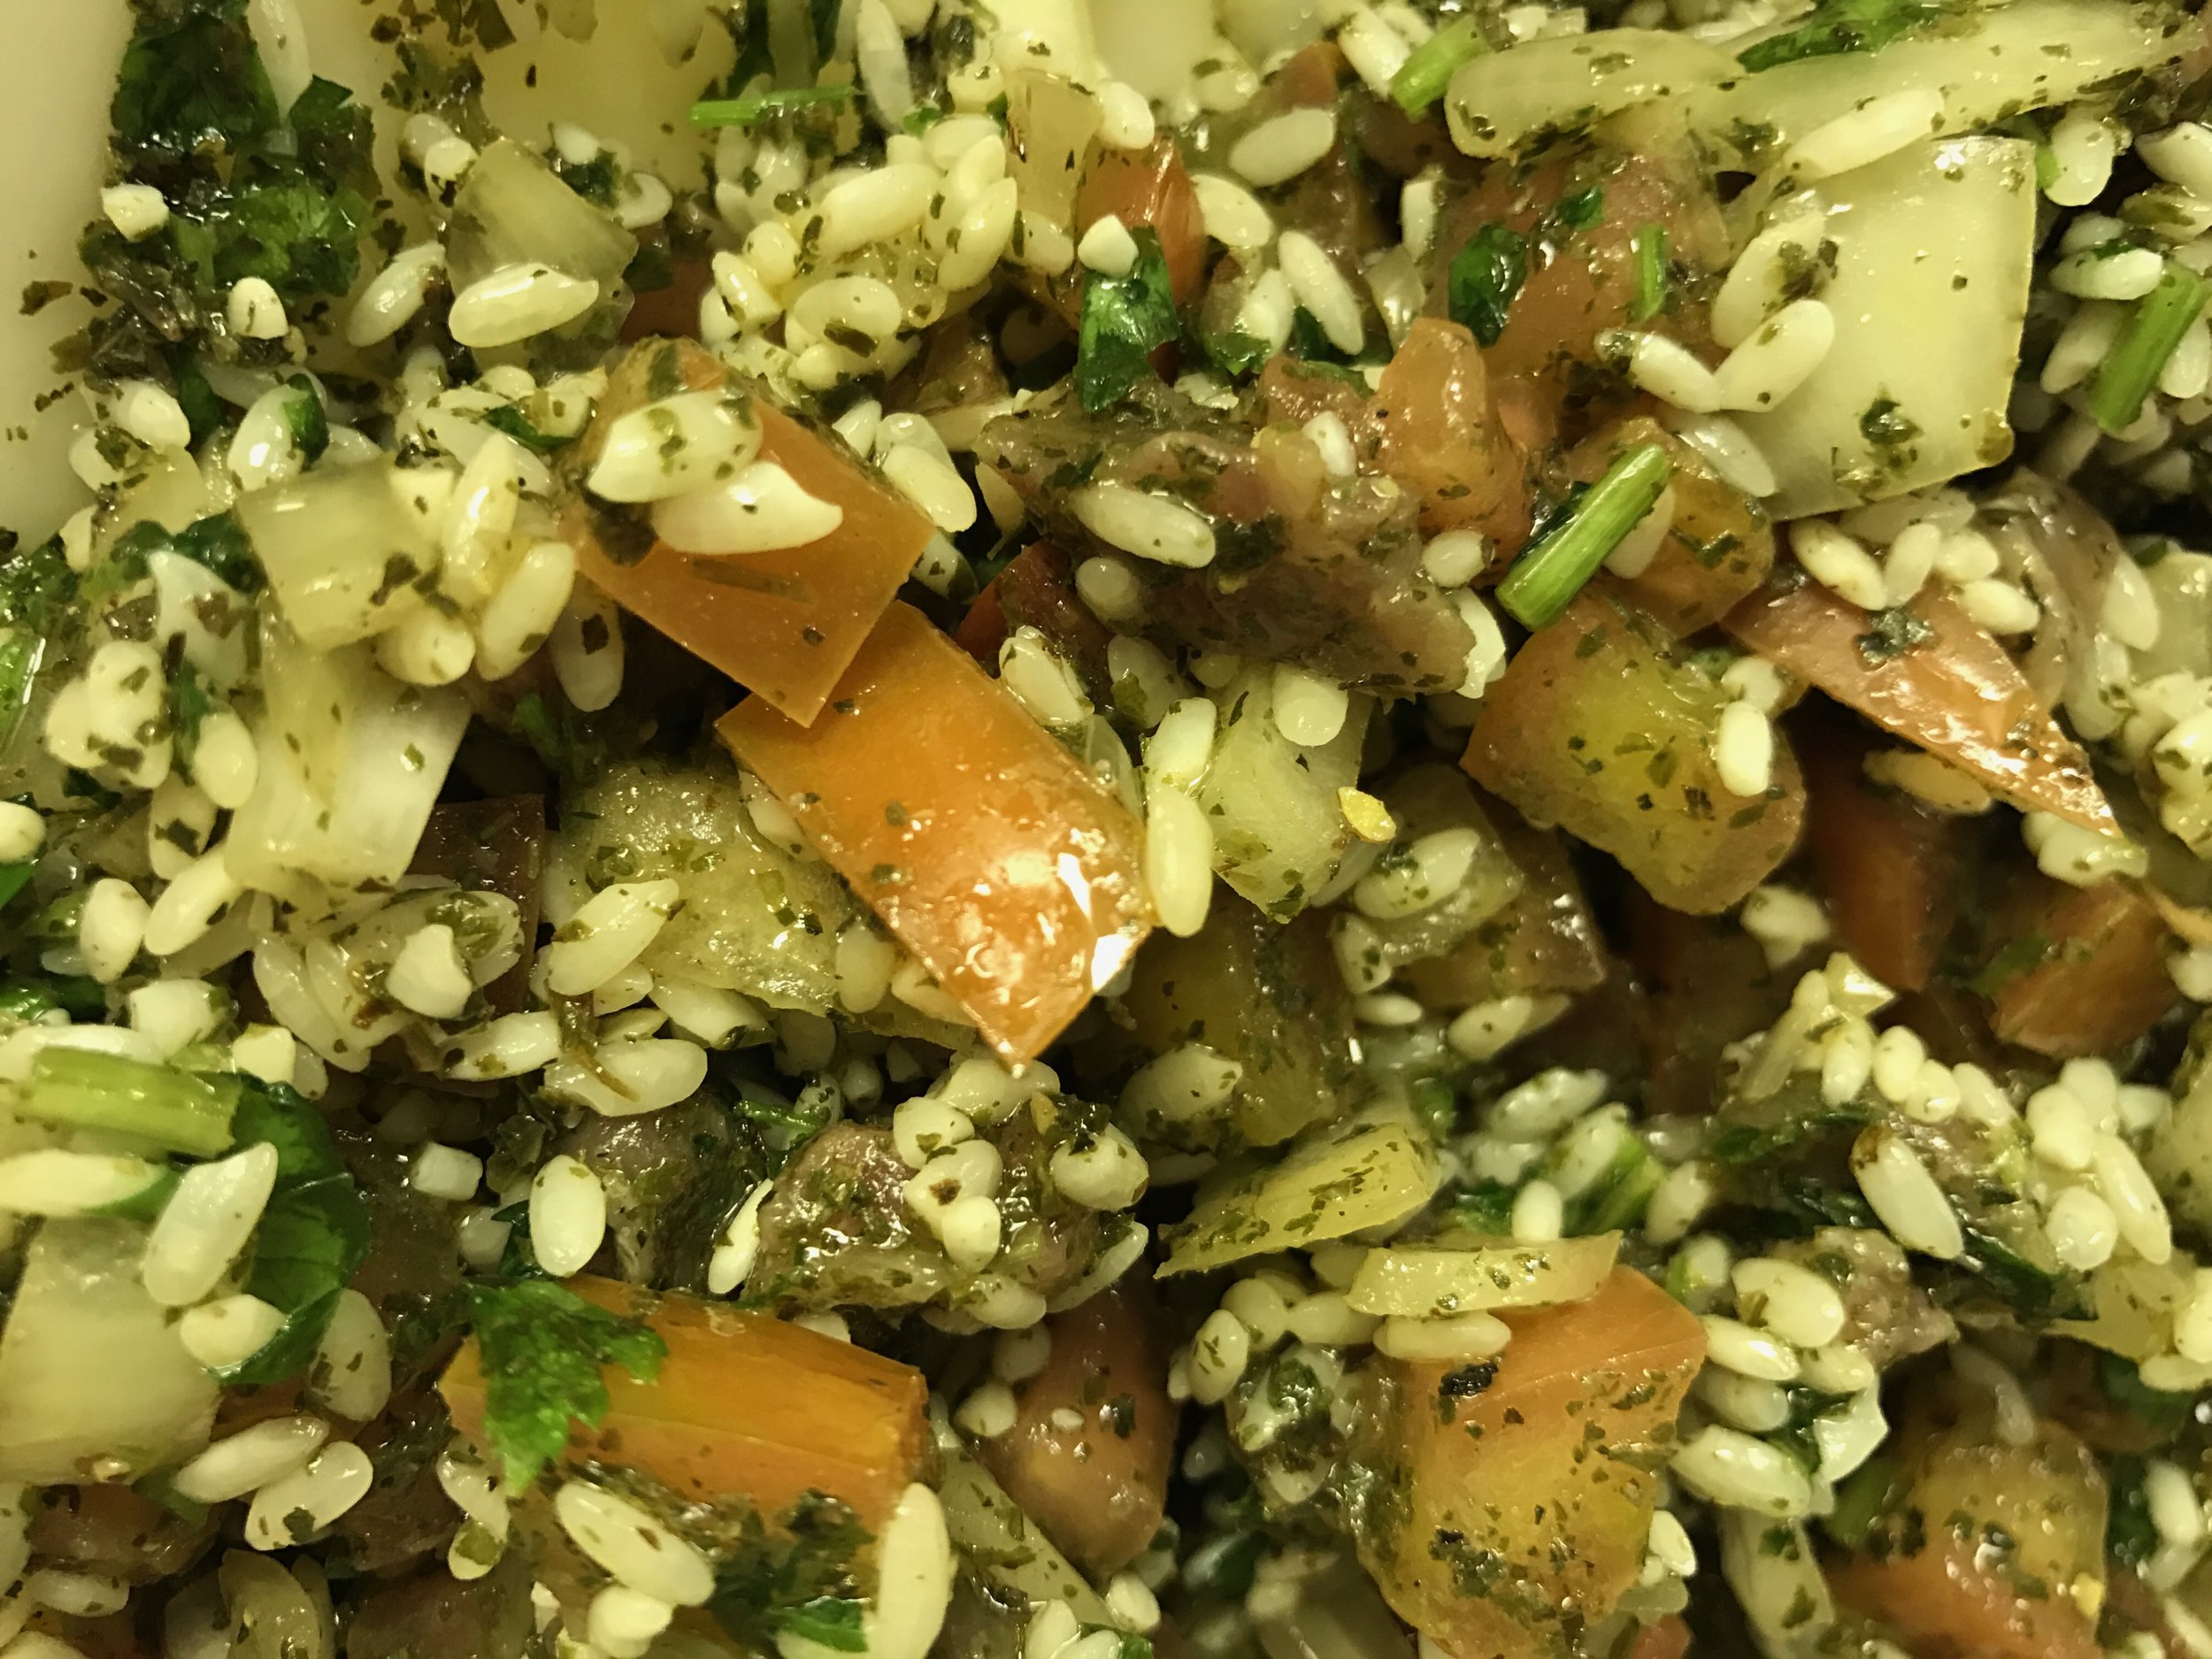
grapeleavesricemixture

I got to bring out a few old kitchen friends for this project. I used, but not pictured here, my trusted Pyrex #404 yellow Pyrex bowl for mixing the stuffing and I boiled the stuffed grape leaves in my Caribbean Le Creuset Dutch oven! A new addition to my kitchen last week was an Epicurean cutting board. Did you know that they are responsibly made in Duluth, Minnesota, USA? I rolled my grape leaves on top of this cutting board. The smooth surface made it pretty easy for me to chop my vegetables and use it for rolling.

To protect them from unraveling during the cooking process, I used pieces of potatoes and broken grape leaves (I don't like to waste things around here) to fill in all the nooks. I can't explain the feeling inside of me when I stared into my pot and saw the layers of grape leaves perfectly "tetris'd" together so that they would not budge. You see, this pot had never held grape leaves before. And my kitchen has never witnessed such a rolling event. There were so many things that could have gone wrong, but there they all were...snugly waiting to be enjoyed by us all, well, after another hour of simmering! 

Voila! They did not fall apart! If I never make time to do this again, I can say...once upon a time, I had a pot in my kitchen full of stuffed grape leaves and they were...delicious! I can't believe it took me so long to try making these when I pay so much for them at Middle Eastern restaurants...and dare I say...mine are way better than any grape leaves I've ever eaten! I felt like the luckiest person in the world. Ok, enough self congratulatory comments. But I'll leave you with the trick to this whole thing: all you have to do is forage grape leaves on a beautiful summer day in Minnesota. 


Stuffed Grape Leaves

40-50 grape leaves, preferably foraged

Stuffing:
1 1/2 cups of rice
6 roma tomatoes (make sure they are still a bit hard)
1 medium onion, diced
1 cup parsley, finely chopped
1TBSP 7 spice
2 tsp salt
1 TBSP pepper
1 1/2 cup of meat, diced (optional)
1 cup olive oil

1 cup lemon juice
1 cup water
1 medium potato, cut into 1/2 inch thick slices to line the bottom of the pan

Mix all the ingredients under stuffing in a Pyrex 404/444 or medium bowl. 

Roll grape leaves. I did this by pointing the stem side towards me and adding about 1 TBSP of stuffing onto the "fatter" part of the leaf. Make an elongated shape (lengthwise/left to right) with the stuffing (think a thin AA battery). I folded the bottom part up, then folded in the slides and rolled it out. You may want to watch a video on this, as I may  not be clearly explaining "how I roll." The thinner the stuffing is, the more layers of grape leaf you can roll around the stuffing and thus the more lemon juice it will soak up and the tastier it will be.

Stack all grape leaves snugly against each other, on top of the layer of potatoes. DO NOT SKIP THIS STEP. Or you will really regret it, because the heat could break the leaves and you'll end up with a pile of mush as your bottom layer. Keep stacking additional layers. I had 3 layers for mine. Pour in lemon juice and water. When liquid boils, turn down to a simmer and let it be that way for about an hour. After the pot cools, gently remove grape leaves and set into a storage container of your choice,

February 28, 2017 /V
Recipes, Pyrex 404
Weekend Meals
Comment

Will Bake for Good Friends

February 21, 2017 by V in Baking, Vintage Pyrex

This weekend, I had a special friend, Rachel, over for lunch. Someone, who recently has inspired me to not only do what's comfortable, but to stretch and reach into that creative nook that rests sleepily inside of me. With having to "get it together" in so many facets of my life, sometimes I forget the fulfillment that comes from attempting to create, even if the end result isn't quite at the caliber that I wish it to be if I had spent more time nurturing the few artsy sparks that flicker around. I need to learn to not ignore those moments, but the better strategy may be actually making the space in my life to kindle the fire.

Making space means creating an environment where it doesn't seem like a hassle to do something creative. I equate this to the feeling I have when I am alone and hungry. Often, I think it most easy to go to a nearby drive thru or better yet, reheat some leftovers, and call it a meal because it's too much work to cook up a storm. When I'm in a good place and want to entertain friends, I like to make something home made to share. Even if it that means that I have to pull everything out of the cupboard to look for a specific vintage cake pan from my ever growing collection. Even if it means I have to put it all away when I find the item I need way in the back corner. Even if it looks from my kitchen like I got robbed. Maybe that's why I need to surround myself with people that inspire me. It makes me think life is worth the mess.

I was looking for the #221 Flamingo Pink Pyrex cake pan I bought five years ago on craigslist from Carolyn who now is a dear friend because she shares so many of my interests. I still remember driving to go pick up my Pyrex at her house in South Minneapolis. I even coordinated with Jessica to come a long for back up. Just in case. After all, it is craigslist!

So sometimes my hobbies amalgamate nicely. I like to cook. I like cooking with vintage bake ware. I like presenting friends with the things I've made in my vintage bake ware.

If you happen to have the #221 Pyrex cake pan, this recipe fits nicely into it. The cake didn't rise too much and I thought the blackberries looked lovely in the hot pink Pyrex cake pan!


Blackberry Ricotta Cake

1 1/2 cups all-purpose flour
3/4 cup sugar
2 teaspoons baking powder
3/4 teaspoon kosher salt
3 large eggs
15 oz Trader Joe's ricotta
1 teaspoon vanilla extract
1/2 cup (1 stick) unsalted butter, melted
1 cup frozen blackberries, divided
zest of medium lemon
juice from half of the lemon

Preheat oven to 350°F. Line a #221 size Pyrex cake pan with parchment paper and lightly coat with nonstick spray. I used leftover butter, to butter up the sides.

Whisk eggs, ricotta, and vanilla in a Pyrex 404/444 or medium bowl bowl until smooth, add zest and lemon juice; fold into dry ingredients just until blended. Then fold in butter, followed by 3/4 cup blackberries, taking care not to crush berries. Scrape batter into prepared pan and place remaining 1/4 cup blackberries over top.

Bake cake until golden brown and a toothpick inserted into the center comes out clean, 50–60 minutes. Let cool at least 20 minutes before removing from the cake pan.

Do ahead: Cake can be made 2 days ahead. Store tightly wrapped at room temperature.

February 21, 2017 /V
Pyrex, Breakfast Recipes, Pyrex 221, Pyrex In Action
Baking, Vintage Pyrex
2 Comments
applepopover

Dressing up the Cast Iron Skillet

January 22, 2017 by V in Baking

It was a weekend of baking. I don't remember what came first...the cast iron skillet or the desire to eat something sweet at the crack of noon (I am not a morning person). It's like...what came first? The chicken or the egg?

For a long time I've been eyeing the cast iron skillets that sit in the cupboards...way in the back corner. I didn't want to use them because the thought of cleaning them gave me anxiety. I just don't know how to. Or more accurately, I get nervous I might ruin the skillet and prevent future generations of inheriting it. I really have no excuse as every time I think of avoiding a project because of my "I don't know how to do anything woes," I hear my friend Mona's voice in the back of my head say, "you can learn anything just by googling it!" Ugh...reality slap! There is no good excuse for anything these days when it's literally at your fingertips!

So one simple search later I find Pioneer Woman's methods on cleaning. Enough ammunition for my next few attempts.

Attempt #1 Apple Popover

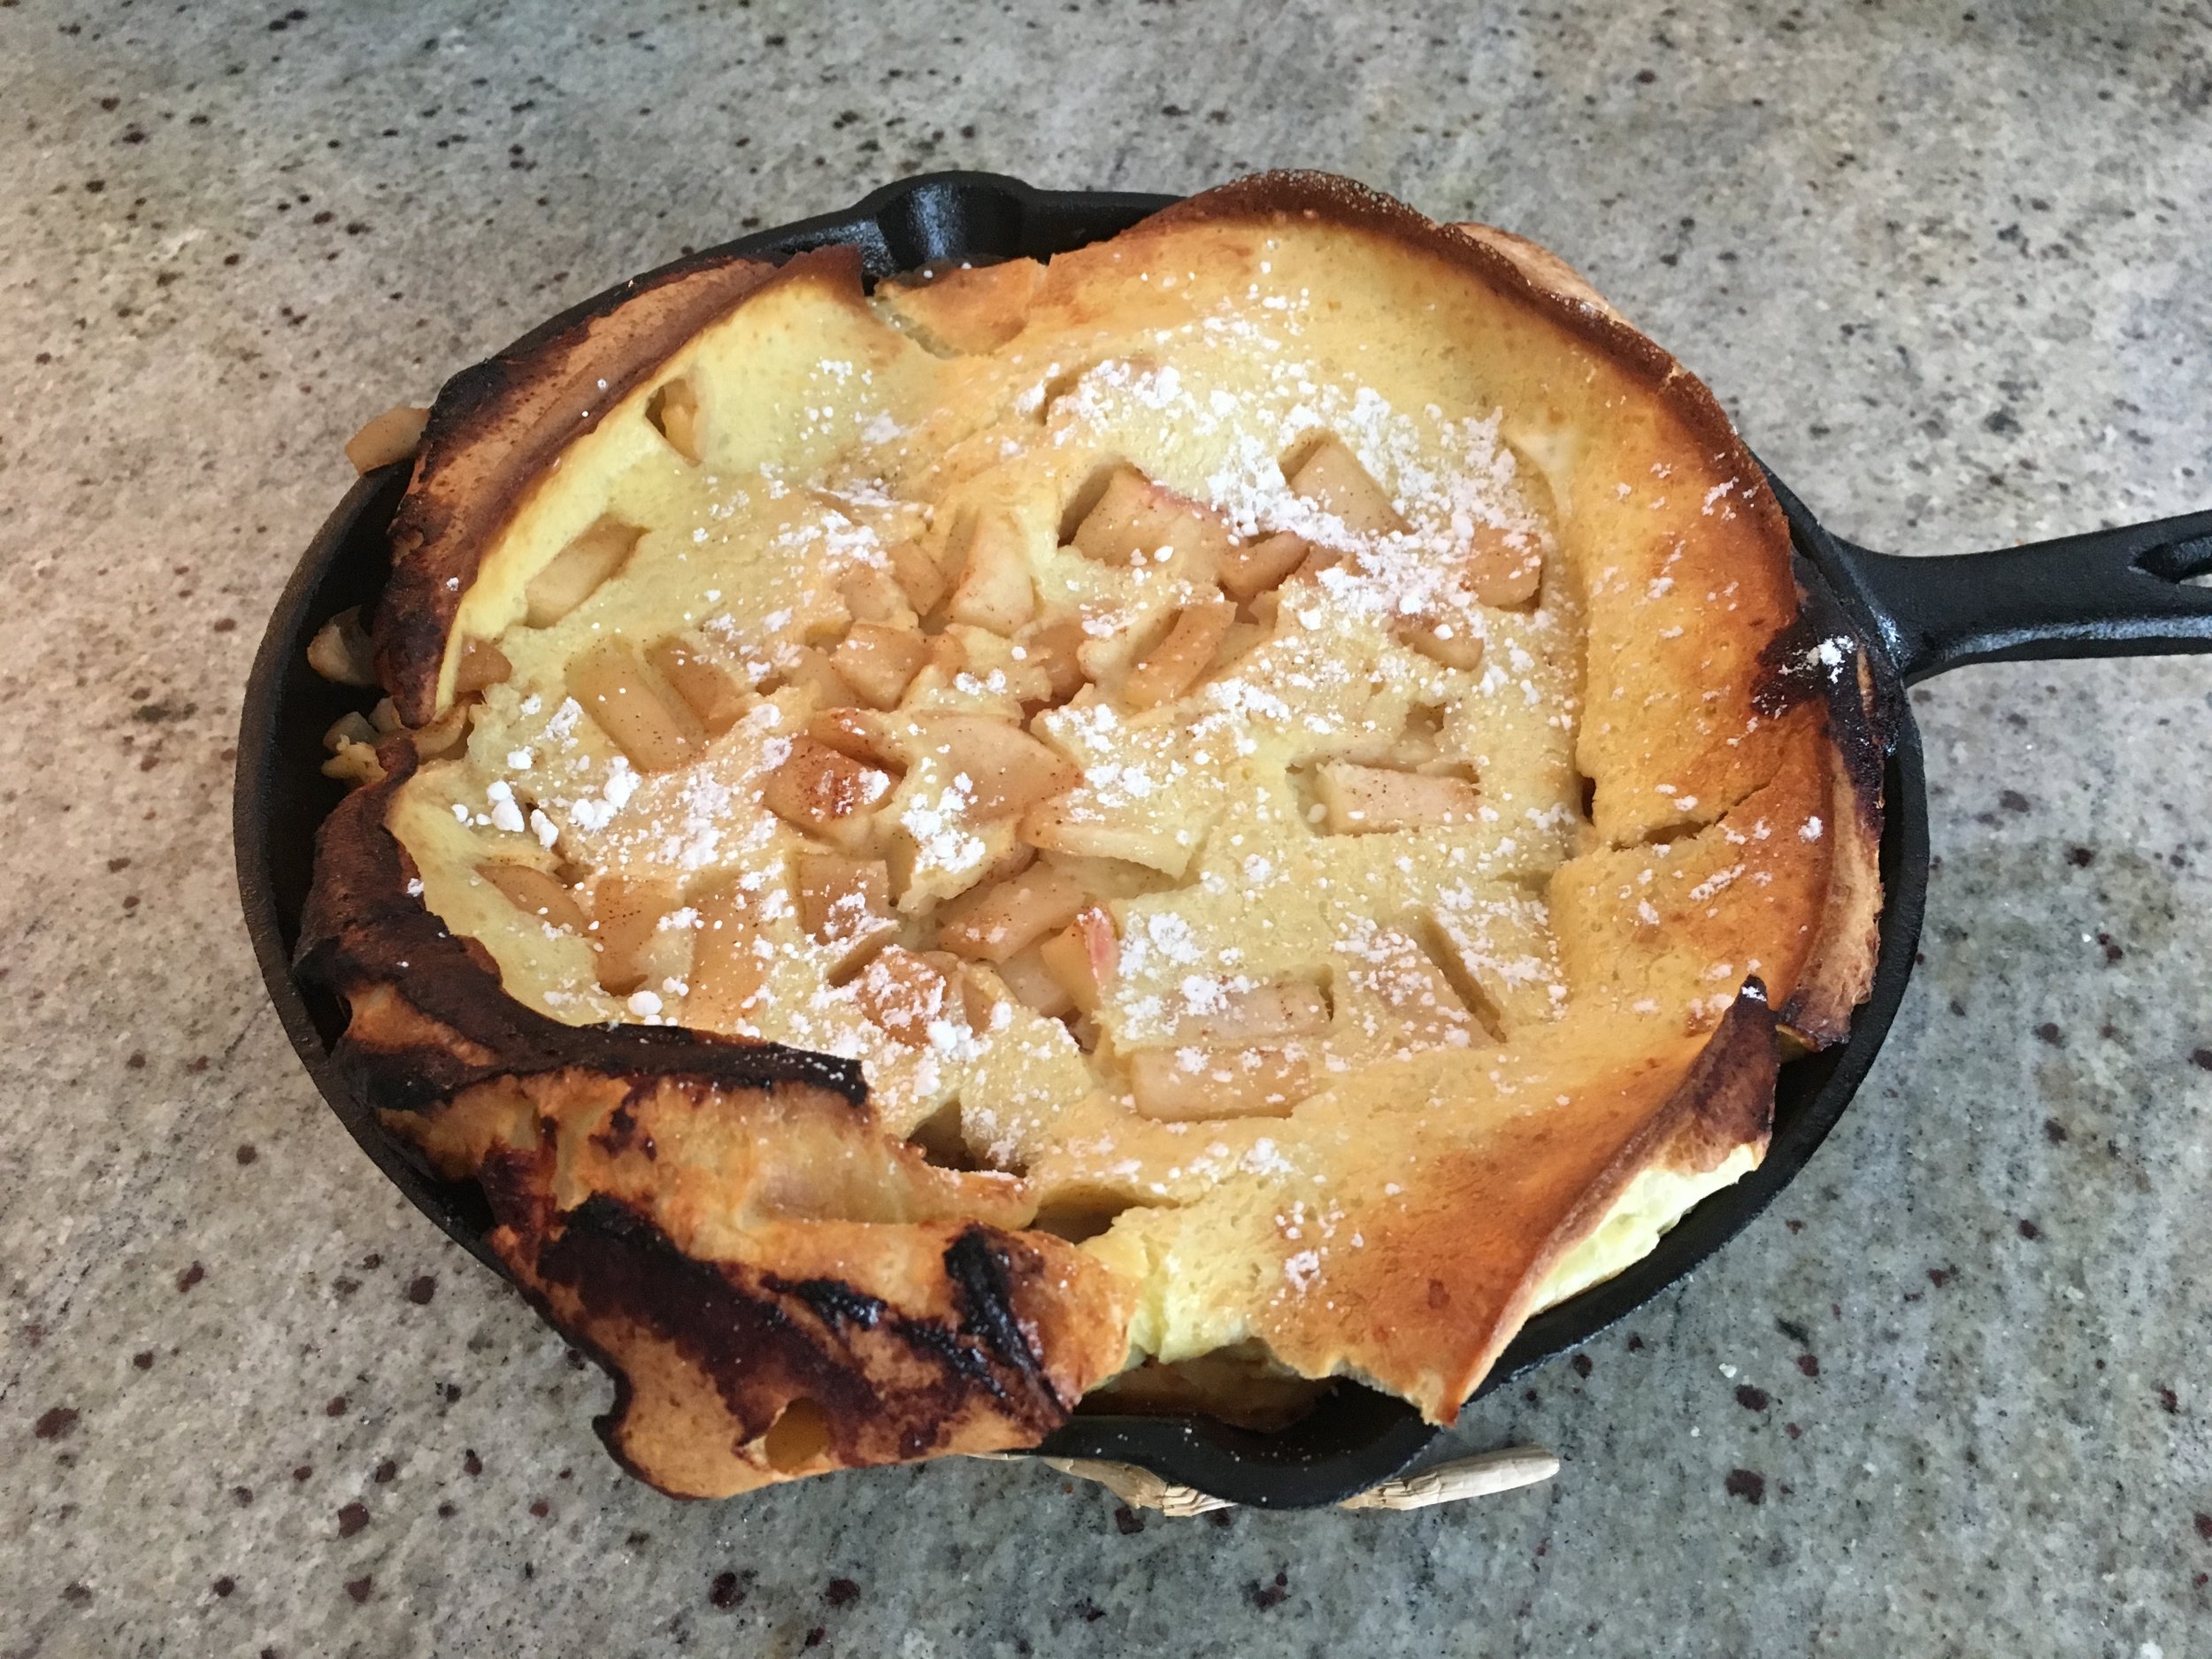
The apple popover was inspired by a trip many moons ago at my first Airbnb experience in Duluth, MN. The host actually made us breakfast one morning and I've wanted to duplicate that steamy, Apple popover since! I don't know why I have projects in my head forever before I ever attempt them. Do you do that? So four years later, voila, I finally did it. The Stars have finally aligned!

The original recipe I used called for a 11x13 pan but instead I used a 9 inch cast iron skillet which is the whole point of this blog post. I believe the size of my cast iron skillet was the reason why mine wasn't as poufy in the middle as my host's version. My popover only sort of rose on the sides. If you understand the science behind this please explain it to me!

Attempt #2 Blueberry Streusel

The next day, after feeling some triumph from not having my popover cemented into the cast iron skillet (use butter!!! Lots!!!) I remembered my large container of blueberries from our most recent Costco trip. Then the sudden realization that it was the last weekend of summer hurled me towards confronting my bias against baking with seasonal fruit. Cooking with apples is one thing, they don't seem that special because they're around all the time...but blueberries! They're so precious because you hardly find them out of season. Or in my situation I both refuse to pay the price for them out of season nor believe in the idea of transporting them to wherever I am out of season.

So I decided to make a blueberry streusel. BTW, streusel apparently means a combination of flour, sugar, cinnamon and butter which ends up looking like chunk of crumb.

So if you have a few cast iron skillets you bought that's collecting dust...season it...and let the baking begin!

January 22, 2017 /V
Breakfast Recipes
Baking
Comment

American Pyrex

July 05, 2016 by V in Vintage Pyrex, Baking

Every time there's a holiday, I wish I was more prepared - with clothing, decorations and especially food. This year, I whipped together a quick (yes, I doctored cake mix) 4th of July Celebration Cake and I was quite happy with the result.

I was happy I got to use my pink desert dawn Pyrex 231 bakeware. Due to it's small size, I often use it as a way to store leftovers instead of putting it to better use (like letting it hang out in the oven). This 4th of July - it got to be the supporting star!

The Pyrex 231 holds 1.5 quarts. Measurements are about 11.5 x 6.5 and 2 inches deep.

The frosting is inspired by the kind you get at Asian Bakeries. It's heavy whipping cream based - light and fluffy, but not very sweet. I never liked the super sweet frosting. To me, it takes away from the cake.

I couldn't bring it to the park, where the holiday celebration included an orchestra playing Tchaikovsky's 1812 Overture (complete with real cannons!) and banh mi sandwiches on a picnic blanket. The frosting would have melted because it was so hot and quite frankly, I couldn't have transported it there without somehow compromising the visuals.

So after returning home, the 4th of July holiday ended with a piece of cake! Try it next year...or use this recipe to put together another creation for the next holiday!


American Pyrex Cake
serves about 12 (depending on how big you cut the slices!)

Cake:
1/2 box of yellow cake mix
2 eggs + 1 egg white
1/2 cup whole milk
2 TBSP butter, melted
2 TBSP olive oil
1 1/2 tsp vanilla extract

Frosting:
1 1/2 cup heavy whipping cream
2 TBSP powdered sugar
1 1/2 tsp vanilla extract

Toppings:
Strawberries, trimmed and cut in half
blueberries, about 30

Preheat oven to 350F/180C.

For the cake, mix together all wet ingredients in a small bowl. Then pour it into the bowl with the cake mix. Try to use a spatula and mix a few times, don't over mix or it will make a tough cake! Pour into greased Pyrex 231 bakeware. Stick in oven for 20-22 minutes.

For the frosting, using a large bowl and a hand mixer, mix all ingredients until soft peaks form. Put frosting in fridge until ready to frost!

When the cake is cooled, apply the frosting and arrange the fruit to your heart's liking!

July 05, 2016 /V
Pyrex 231, Dessert Recipes, Pyrex In Action
Vintage Pyrex, Baking
Comment
ombrerhubarb

Rhubarb Ombré Mochi Cake w/ Lilac Jelly

June 13, 2016 by V in Vintage Pyrex, Baking

Summer is finally here!

Sarah of Colorado Crafted and Two Tarts reminded me it was summer when she posted a beautiful picture of her Rhubarb Cake on Facebook. I later found out she was inspired by the rhubarb recipe she saw on Smitten Kitchen and I naturally had to try to make this beautiful cake for my own brunch party.

I didn't have all the ingredients necessary to make the picnic bars on Smitten Kitchen, so I decided to research how to make my rhubarb chevron pattern with another recipe for a dense cake. This got me thinking to my recent trip to Hawaii and the wonderfully dense and delicious blueberry mochi cake that my friend had made. Ever since I came back to the mainland, I wanted to try it...so here we are!

Over the weekend,  I went searching for rhubarb at the Minneapolis Farmer's Market. I searched every booth for the perfect gradient colors to go into our Rhubarb Ombré Cake, but couldn't find the right combination from any one stall. At the end, I decided the best thing to do was to buy the beautiful red stalks we saw from one stall and the speckled green ones from another one.

After gathering your ingredients, perfectly gradient rhubarb and the right pan (preferably the Pyrex 232 bakeware) It is important to cut the rhubarb into perfect parallelograms to get three columns of the chevron pattern into my Pyrex 232 pink desert dawn baking pan!

If I make this again next time, I am definitely going to have less green rows and more of the red rows. Even though the gradient was beautiful - it didn't shift to red fast enough for me. I guess I am particular to the color red.

I have so much rhubarb left and will need to figure out what to do with the rest of my stalks. Rhubarb jam, anyone?

Try my recipe and let me know what you think!

Oh and it's gluten-free!


Rhubarb Ombre Mochi Cake

Cake:
1/2 cup butter (melted)
2 cups coconut sugar
1 1/2 cups vanilla yogurt
1 teaspoon vanilla extract
4 eggs
1 pound mochiko (1 box)
2 teaspoons baking powder
1 cup diced rhubarb

Topping:
About two stalks rhubarb cut into parellelograms
1/4 cup melted jelly of your choice (I used lilac jelly)

Preheat oven to 350F/180C.

Mix the butter and sugar in a large bowl.
Mix in the yogurt and vanilla extract.
Mix in the eggs.
Mix in the mochiko and baking powder.
Mix in the rhubarb.
Pour the batter into a greased Pyrex 232 baking pan (or a 9X13 pan).
Bake in oven until golden brown on top and a toothpick pushed into the center comes out clean, about 1 hour.

After the cake is slightly cooled - brush warmed jelly onto the rhubarb for a glossy and glamorous appearance!

Parallelogram Tips: Cut the stalks in half. Then while they are sandwiched, cut them into parallelograms. Try to arrange them outside of the pan first to make sure you have the requisite number of columns first. Once you feel certain, then duplicate the rest of the cuttings and arrange! Ta Da!

June 13, 2016 /V
Dessert Recipes, Breakfast Recipes, Pyrex In Action
Vintage Pyrex, Baking
2 Comments

Showcasing My Urban Decay Shadows

March 02, 2016 by V in Makeup

I've wanted to work on this blog post for awhile. Mostly because I needed to see all my Urban Decay shadows in one place so I don't buy duplicates whenever I want a new color. Which is often these days. Maybe its because it's towards the winter in Minnesota and I just can't wait for spring.

I think it first started when I bought "Kiddie Pool" from Urban Decay as a single shadow because I didn't own any blue colors. I don't wear this shadow very often because I think it's not as smooth as the "newer" colors. Maybe the formula circa 2011 wasn't the best.

Urban Decay Kiddie Pool

Urban Decay Kiddie Pool

Then one day on Brad's Deals, I saw that the Urban Decay Book of Shadows Vol. 4 was on sale and picked two up - one for both Mona and one for me. I love the packaging on this palette. I'll always love this palette the most as it was my first real UD experience. Such fond memories of using this palette! 

Urban Decay Book of Shadows Vol. 4 Palette

Urban Decay Book of Shadows Vol. 4 Palette

I think sometime in 2013, I hit pan on Lost and Sin. I wanted to buy Sin again and saw it in the Ammo Palette at Sephora. I thought, why not just get a palette and try out more colors? I love how compact this palette is. There's not a lot of product, but I think it's a great sampling of all the colors. I usually never hit pan anyway!

Urban Decay Ammo Palette

Urban Decay Ammo Palette

In January of 2014, I was visiting with a friend from Vegas and she recommended the Naked 2 Palette for my every day and travel use. My favorite shadow is YDK in this palette!

For the rest of 2014, I caught the UD bug and bought many more palettes on sale. I bought the Glinda palette because I liked the metal packaging and the ability to swap out colors. I love the purple in this palette. The names aren't written in the palette but I found the information on Musings of a Muse:

  • Tornado (vibrant deep purple shimmer)
  • Aura (iridescent white with blue shift/Iridescent white with red shift)
  • Magic (pinkish purple with a golden shimmer)
  • llusion (pale peach satin)
  • Oz (gold with gold glitter/silver with silver glitter)
  • South (warm pale gray shimmer with silver micro-glitter)
  • Read more
Urban Decay Glinda Palette

Urban Decay Glinda Palette

That year, the Dangerous and Feminine Palettes were on sale on Urban Decay. I still am bummed that I didn't also get the Flirty Palette. They were sold out by the time I was onto the sale! 

Urban Decay Dangerous Palette

Urban Decay Dangerous Palette

Urban Decay Feminine Palette

Urban Decay Feminine Palette

When Chef Yadi asked me what I wanted for presents in 2014, I naturally leaned towards more eyeshadow. He agreed to get me the sparkly Moondust eyeshadows and I selected four of my favorite shades: Zodiac, Diamond Dog, Intergalactic and Space Cowboy.

Zodiac.png

And during the fall of 2014, I couldn't stop reading about the Electric Palette because of all the bold colors! So during the Black Friday/Cyber Monday sales, I picked it up! My biggest regret is forgetting to bring this palette with me to India in 2015. It would have been the perfect compliment to all the colors of India! Next time.

Urban Decay Electric Palette

Urban Decay Electric Palette

I felt guilty in 2015 and only bought UD's Vice 4 Palette with a $20 coupon I had saved for the year. Unfortunately, approximately 3 weeks after I purchased it, the palette went on sale. I still feel like I wasted my coupon and UD would not offer me a price adjustment! Grrr...

Urban Decay Vice 4 Palette

Urban Decay Vice 4 Palette

Those are all the Urban Decay shadows I own! I love all of them. I am still trying to incorporate more colors on the weekends so that I spread the love. I'll also update this post directly whenever I get new UD products so that I keep myself organized!

What UD palettes do you own and what do you think of them?

Photo Credits:

Urban Decay Kiddie Pool - Eyeshadow Liptick
Urban Decay Book of Shadows Vol. 4 - Temptalia
Urban Decay Ammo Palette - Lush4Blush
Urban Decay Naked 2 Palette - Drop Dead Gorgeous Daily
Urban Decay Glinda Palette - American Style Beauty
Urban Decay Dangerous Palette - Temptalia
Urban Decay Feminine Palette - Vampy Varnish
Urban Decay Moondust Eyeshadows - Urban Decay
Urban Decay Electric Palette - Urban Decay
Urban Decay Vice 4 Palette - Temptalia

March 02, 2016 /V
Urban Decay Eyeshadows, Urban Decay Palettes
Makeup
2 Comments

Makeup for Campaigning Series: Hillary's Lipsticks

February 01, 2016 by V in Makeup

Are you a woman running for office? Let's face it - whether you are already a makeup junkie or not, you have to review what is appropriate to wear for photo shoots, informal gatherings and formal speaking engagements. I reviewed these same issues with my beauty routine when I started working, campaigning for a semi-public official role at the Minnesota State Legislature and when I had to go to Board meetings. I didn't have thousands of dollars to spend on a stylist to transform my look like other celebrity politicians.

Here's the catch-22: If you don't wear makeup you look tired and washed out. If you wear too much, people don't take you seriously. So the key seems to be to wear enough so you cover any dark eye circles and blemishes but not so much so that people are talking about your lipstick, eyeliner or eyeshadow and not your key message. 

So then, what lip stick color schemes are appropriate? After flipping through pages of Hillary Clinton's photos online, I saw that she stuck with three color schemes for her day look: corals, nudes and pinks. She rarely wore reds or plums unless it was a photo shoot for a portrait or gala. 

Corals

Image from a luncheon on "Inclusive Finance: A Path to the MDGs," hosted jointly by the United States and the Netherlands at the Helmsley Hotel in New York, New York, September 22, 2010

Image from a luncheon on "Inclusive Finance: A Path to the MDGs," hosted jointly by the United States and the Netherlands at the Helmsley Hotel in New York, New York, September 22, 2010

Nudes

Video image from abcnews.go.com from May 12, 2015

Video image from abcnews.go.com from May 12, 2015

Pinks

Image from the Daily Signal from June 15, 2015

Image from the Daily Signal from June 15, 2015

My lipstick tips for your campaign would be:

  1. Know Your Skin Tone - what goes well with it? There are hundreds (maybe even thousands) of shades in corals, nudes and pinks. Know what works with your features.
  2. MakeUp Genius App - to do the above, download this app and play with it. This app is amazing! It uses facial recognition to apply makeup on you so you can see what looks good. You can save the images and share them with your trusted friends to find your campaign look. This app is only for L'Oreal brands, but after you decide on a color you can always look for the same shade in your brand of choice.
  3. Practice - If you're not a regular lipstick person, the last thing you want to do is to only wear the lipstick to your event and not know what it looks like after a few hours of talking, eating or being in the sun. If you're going to use a few go-to lipsticks, wear them before the event in similar circumstances and understand how the product works with your lips.
  4. Lipstick Routine - I find it best to exfoliate with a sugar scrub first. Afterwards, apply the lipstick. Blot it off. Re-applying it makes the lipstick stay on longer. You can also buy lipstick primer/lip liner to keep the product on your lips longer too.

For the record, I think it's very offensive when the media focuses on a female candidate's appearance instead of her campaign message. This post is to help those running for office to be proactive and think about a potentially small issue like "lipstick color" ahead of time so it doesn't become a hindrance to your real goal- winning the seat in office!


February 01, 2016 /V
Politics, Campaigns, Women
Makeup
Comment
Turquoise024

Crocheting for Pyrex

September 18, 2015 by V in Vintage Pyrex, Crochet

Sometime ago, I was catching up with a college friend and he asked me, "So, what do you like to do other than Grandma activities?"

It's fun having friends tease you in a lighthearted manner, but I get that there's always a little bit of truth to a joke. I do really like time consuming activities. Slowly perusing huge antique malls and carefully approaching each booth to see what the dealers have displayed (really, whether they found Pyrex for me) and learning all about "mid century modern" and guessing at items I don't know much about when the LTE signal is too weak inside the huge building for me to confirm anything. I also like touching yarn and trying my hand at crochet patterns. There's something about working on a DIY project and being able to see the finished product. Whether it's a cute baby dress or a pot holder!

Maybe there's something fun about loving an activity that should not be "stereotypically" what someone like me should be doing (whatever someone like me even means!). Like people who meet me and think if I'm Chinese I love cooking and eating Chinese food all the time. When I do, I do love it. But that's not all that's me. My brother and I love spaghetti, hot dogs and hamburgers. We grew up eating that at school. Now we also like eating shoyu chicken, poke and sushi. Maybe part of that is influenced by our love of Hawaii...but mostly because we like to eat good food and why wouldn't anyone want to eat shoyu chicken every day? All this to say that we are the sum of all our experiences. I can love things older than me. I can be Chinese and American.

Pyrex024withlid
crochetmandelavenora

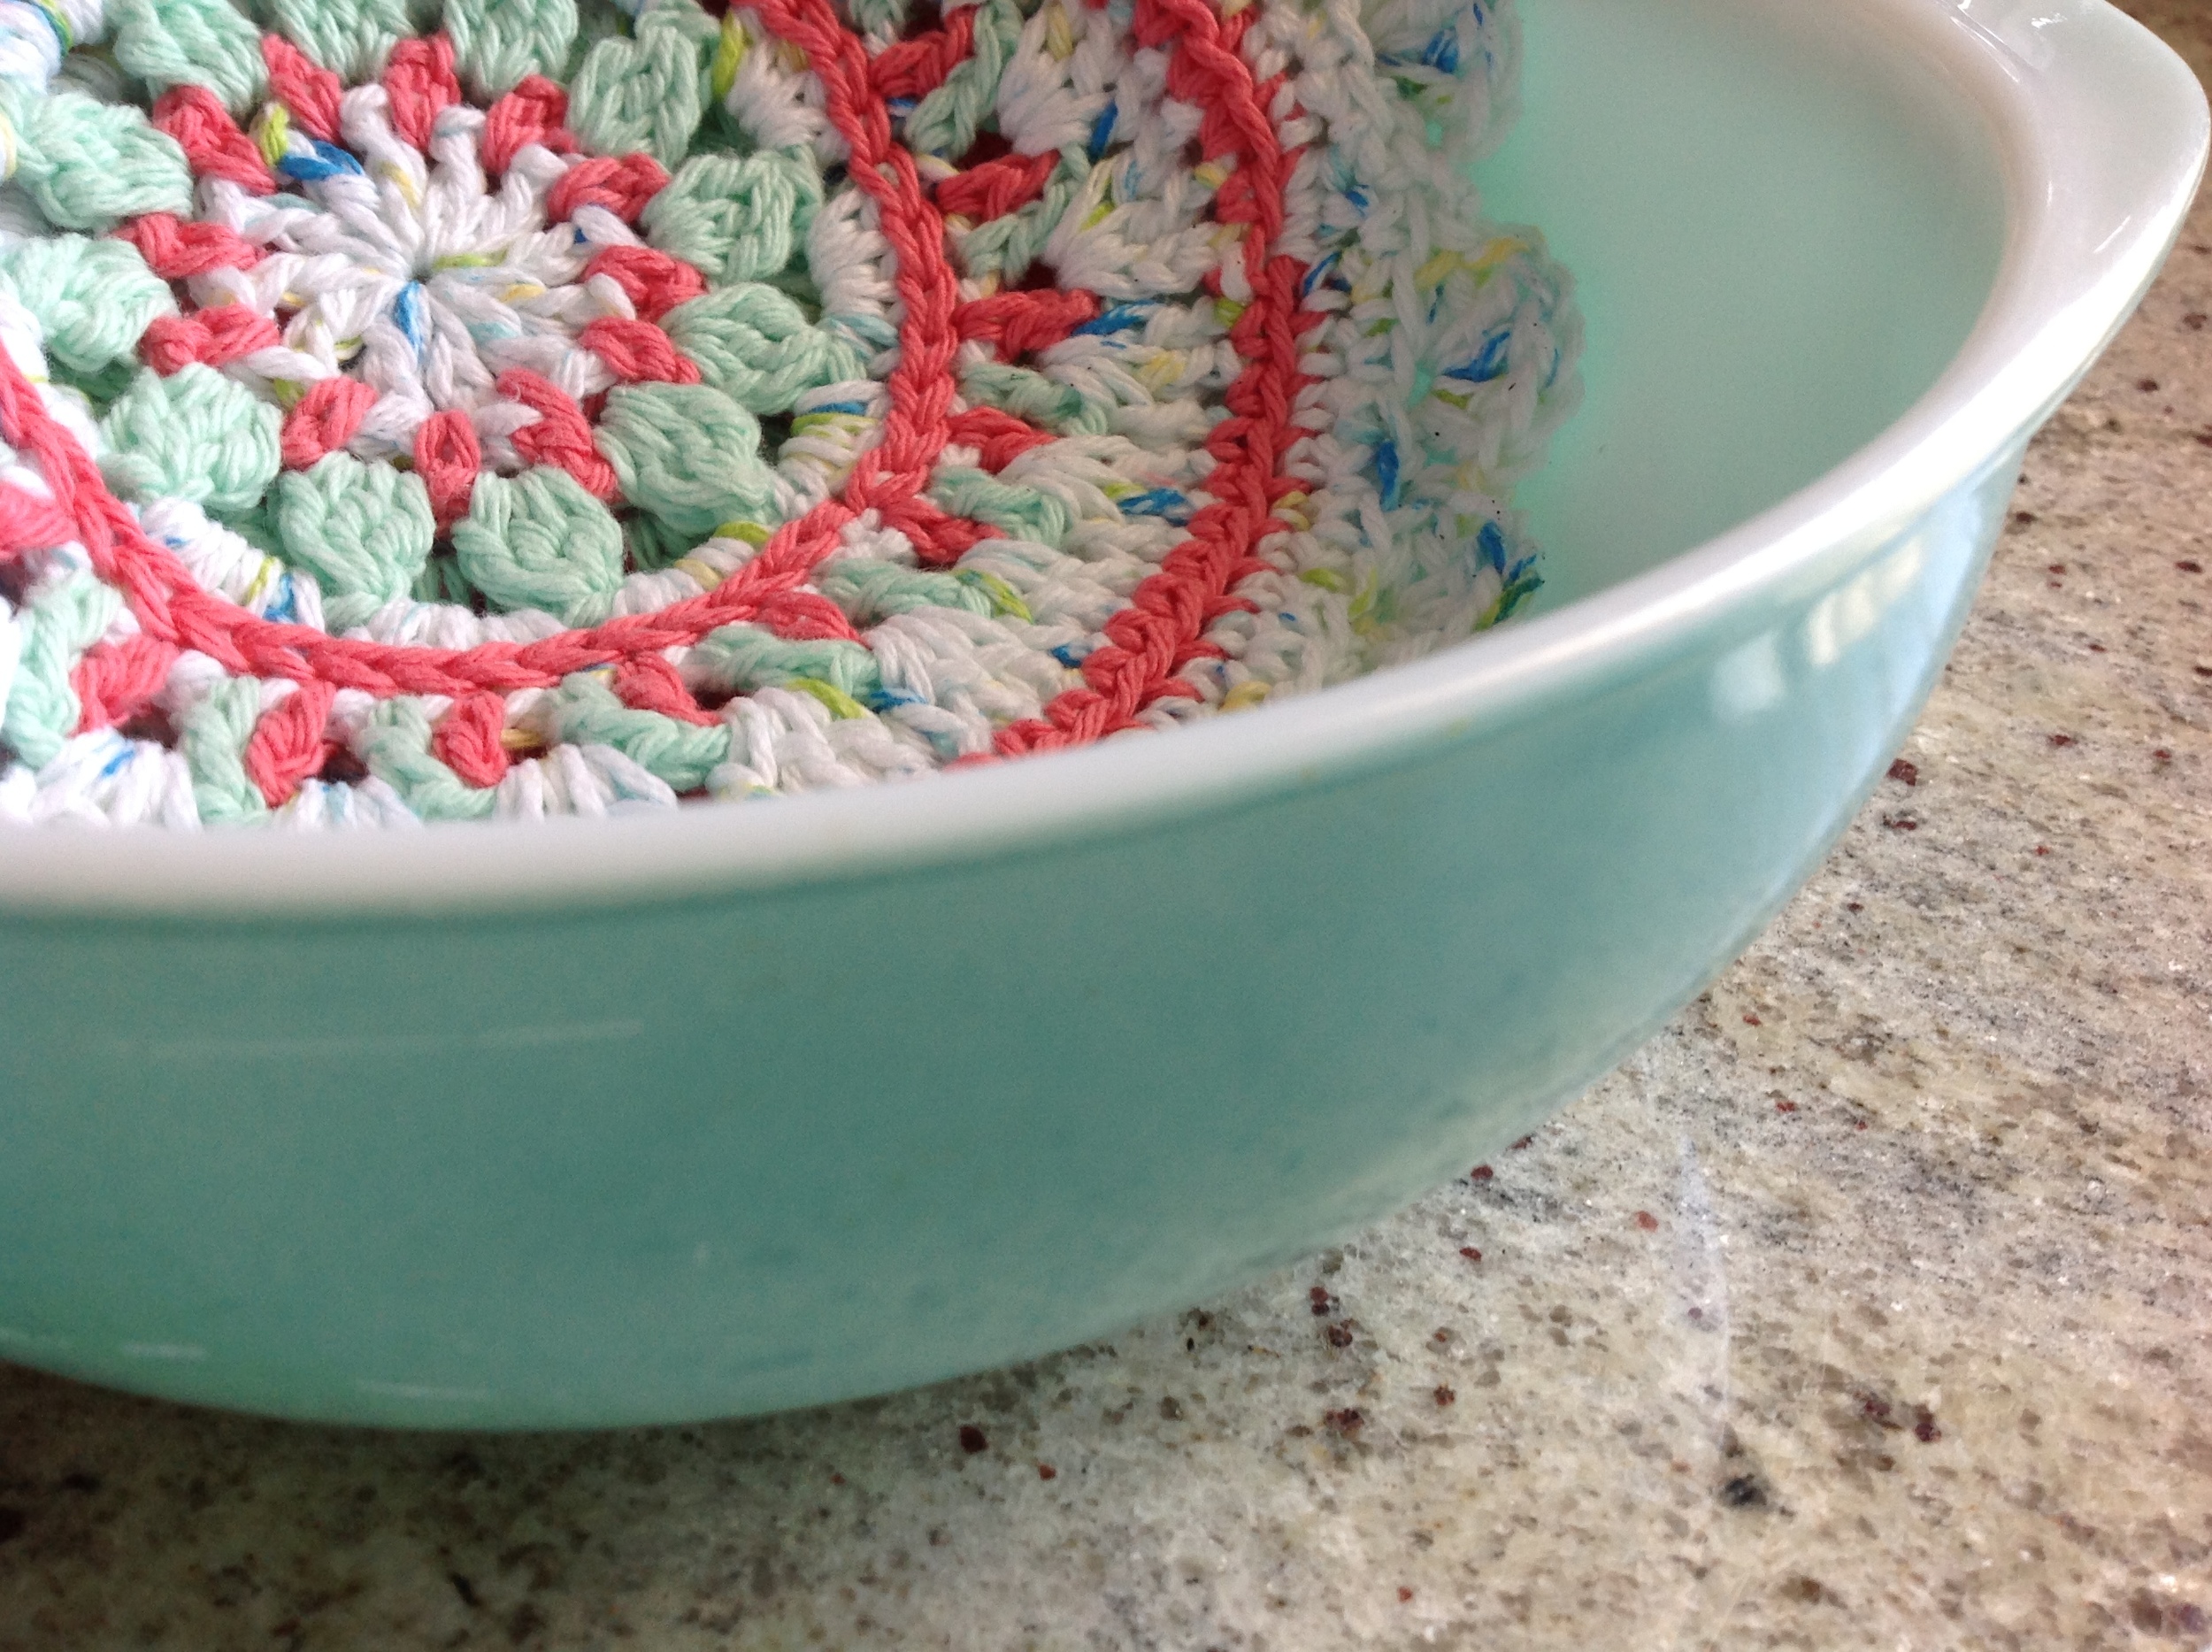
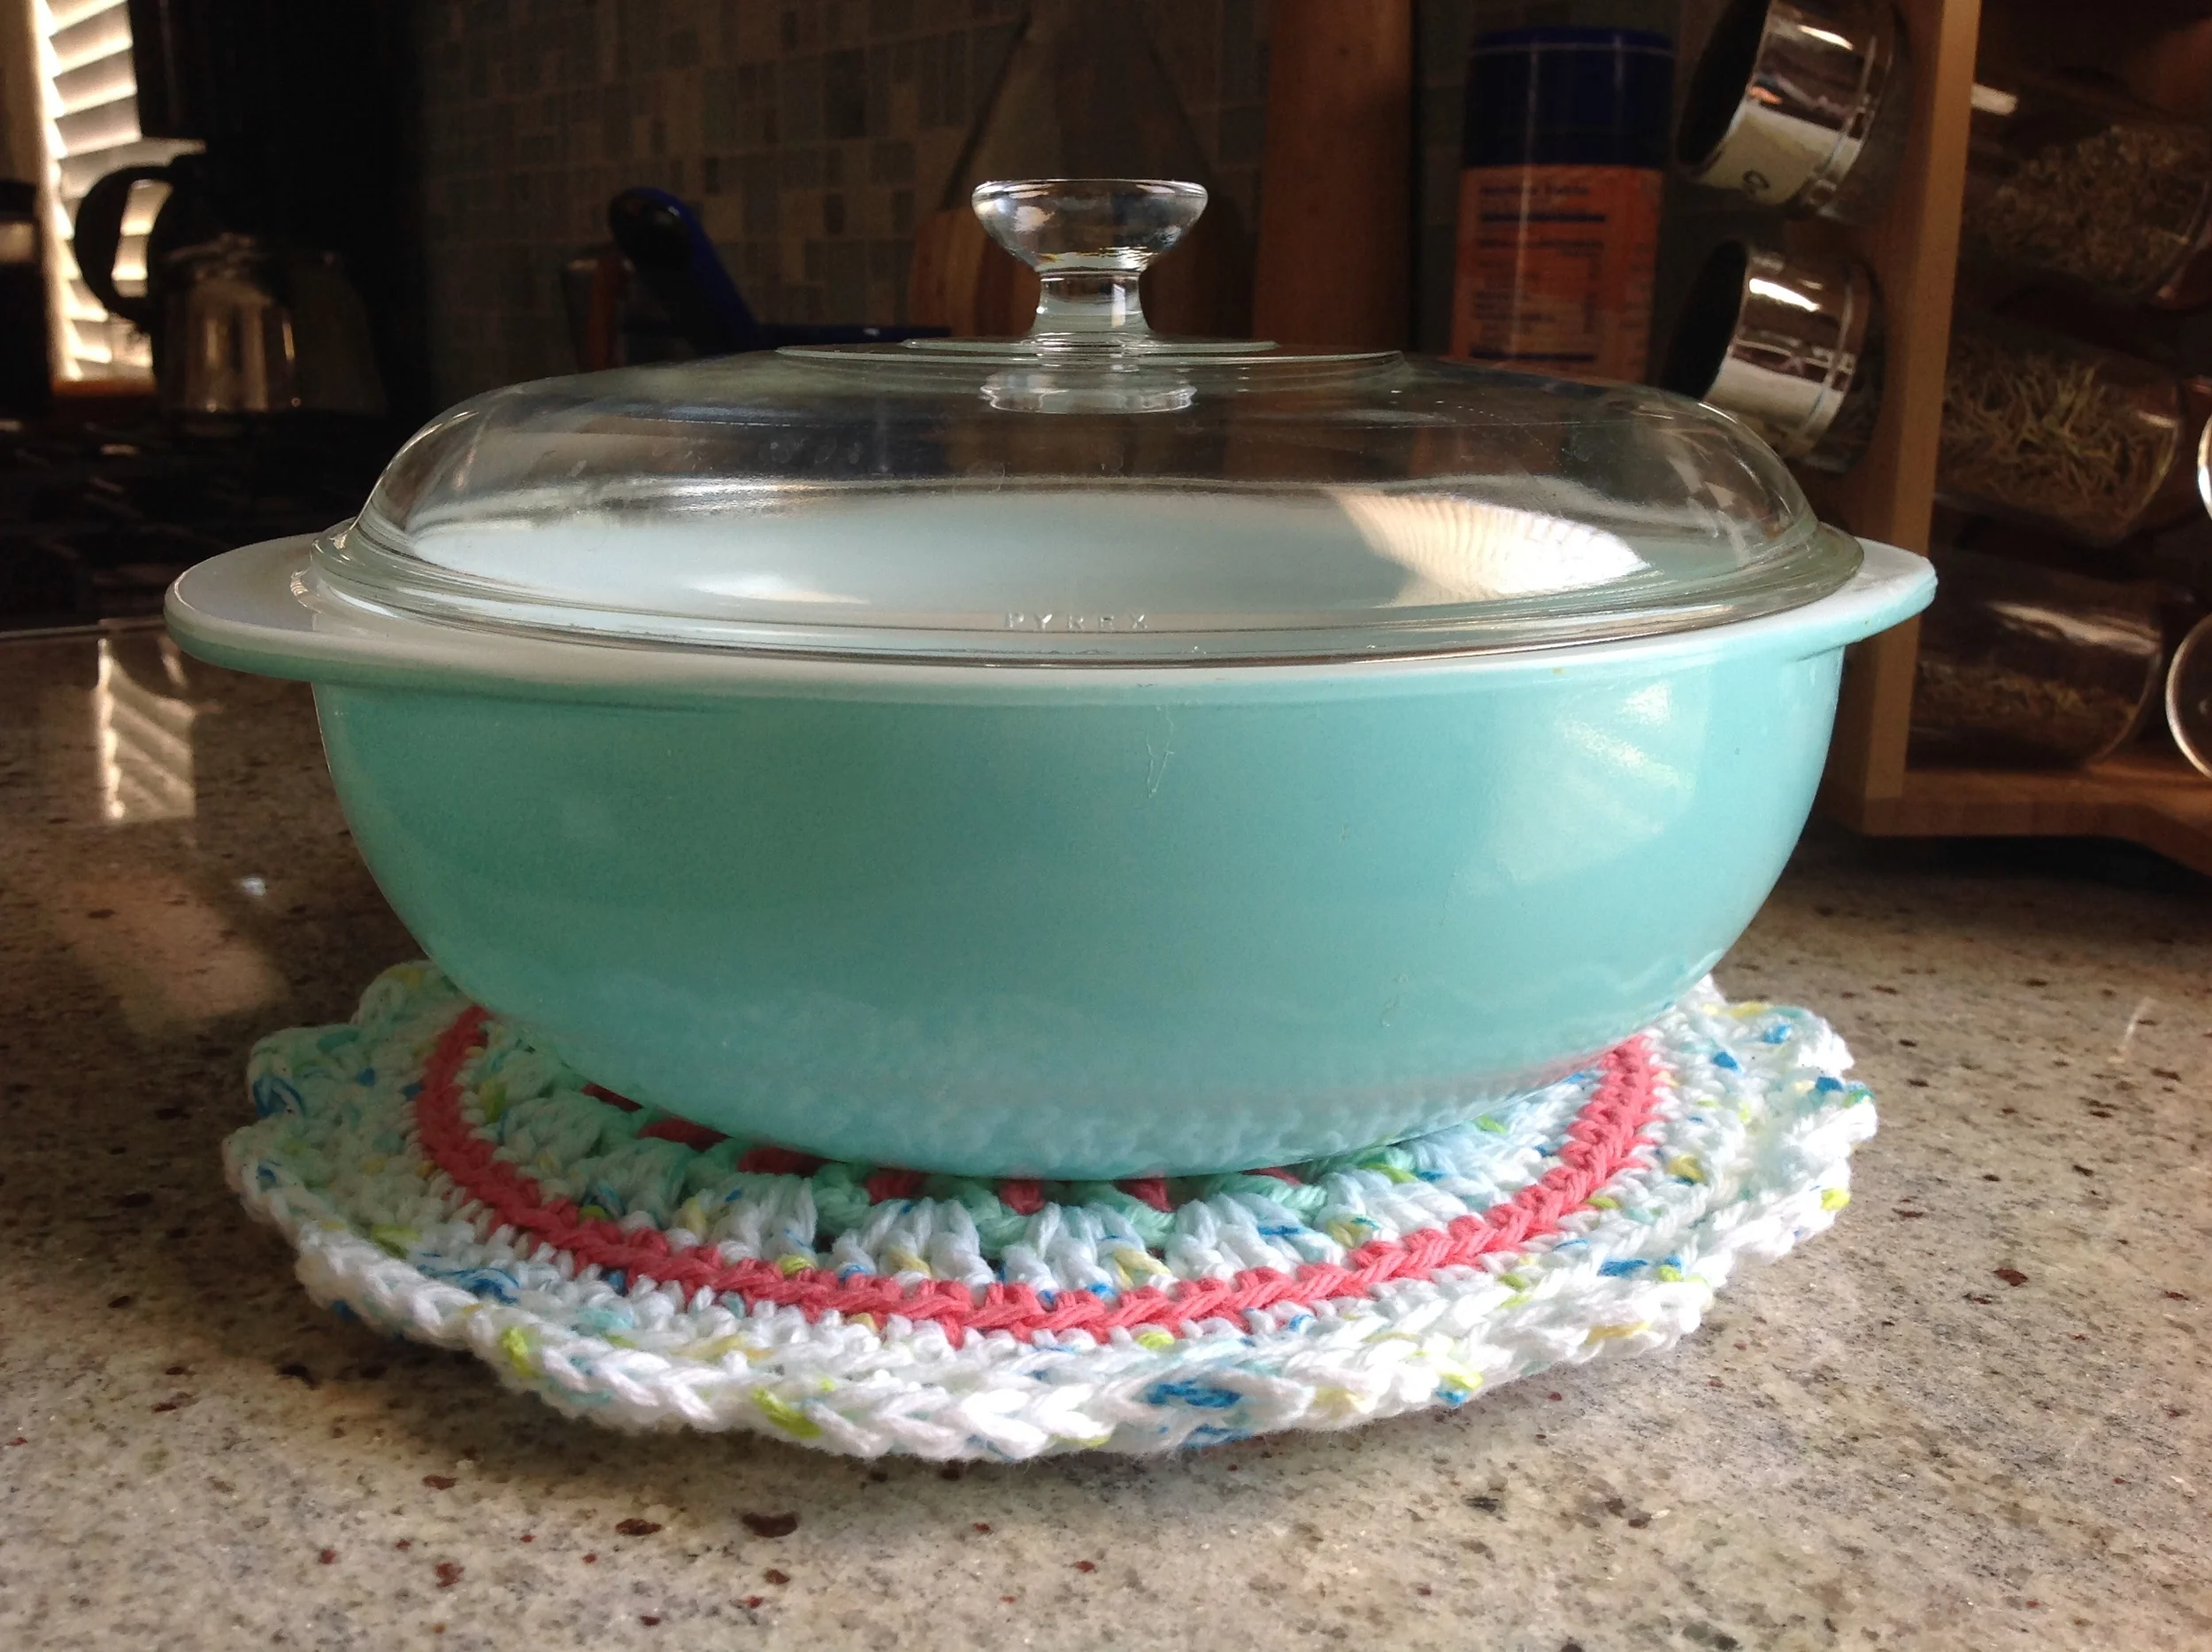
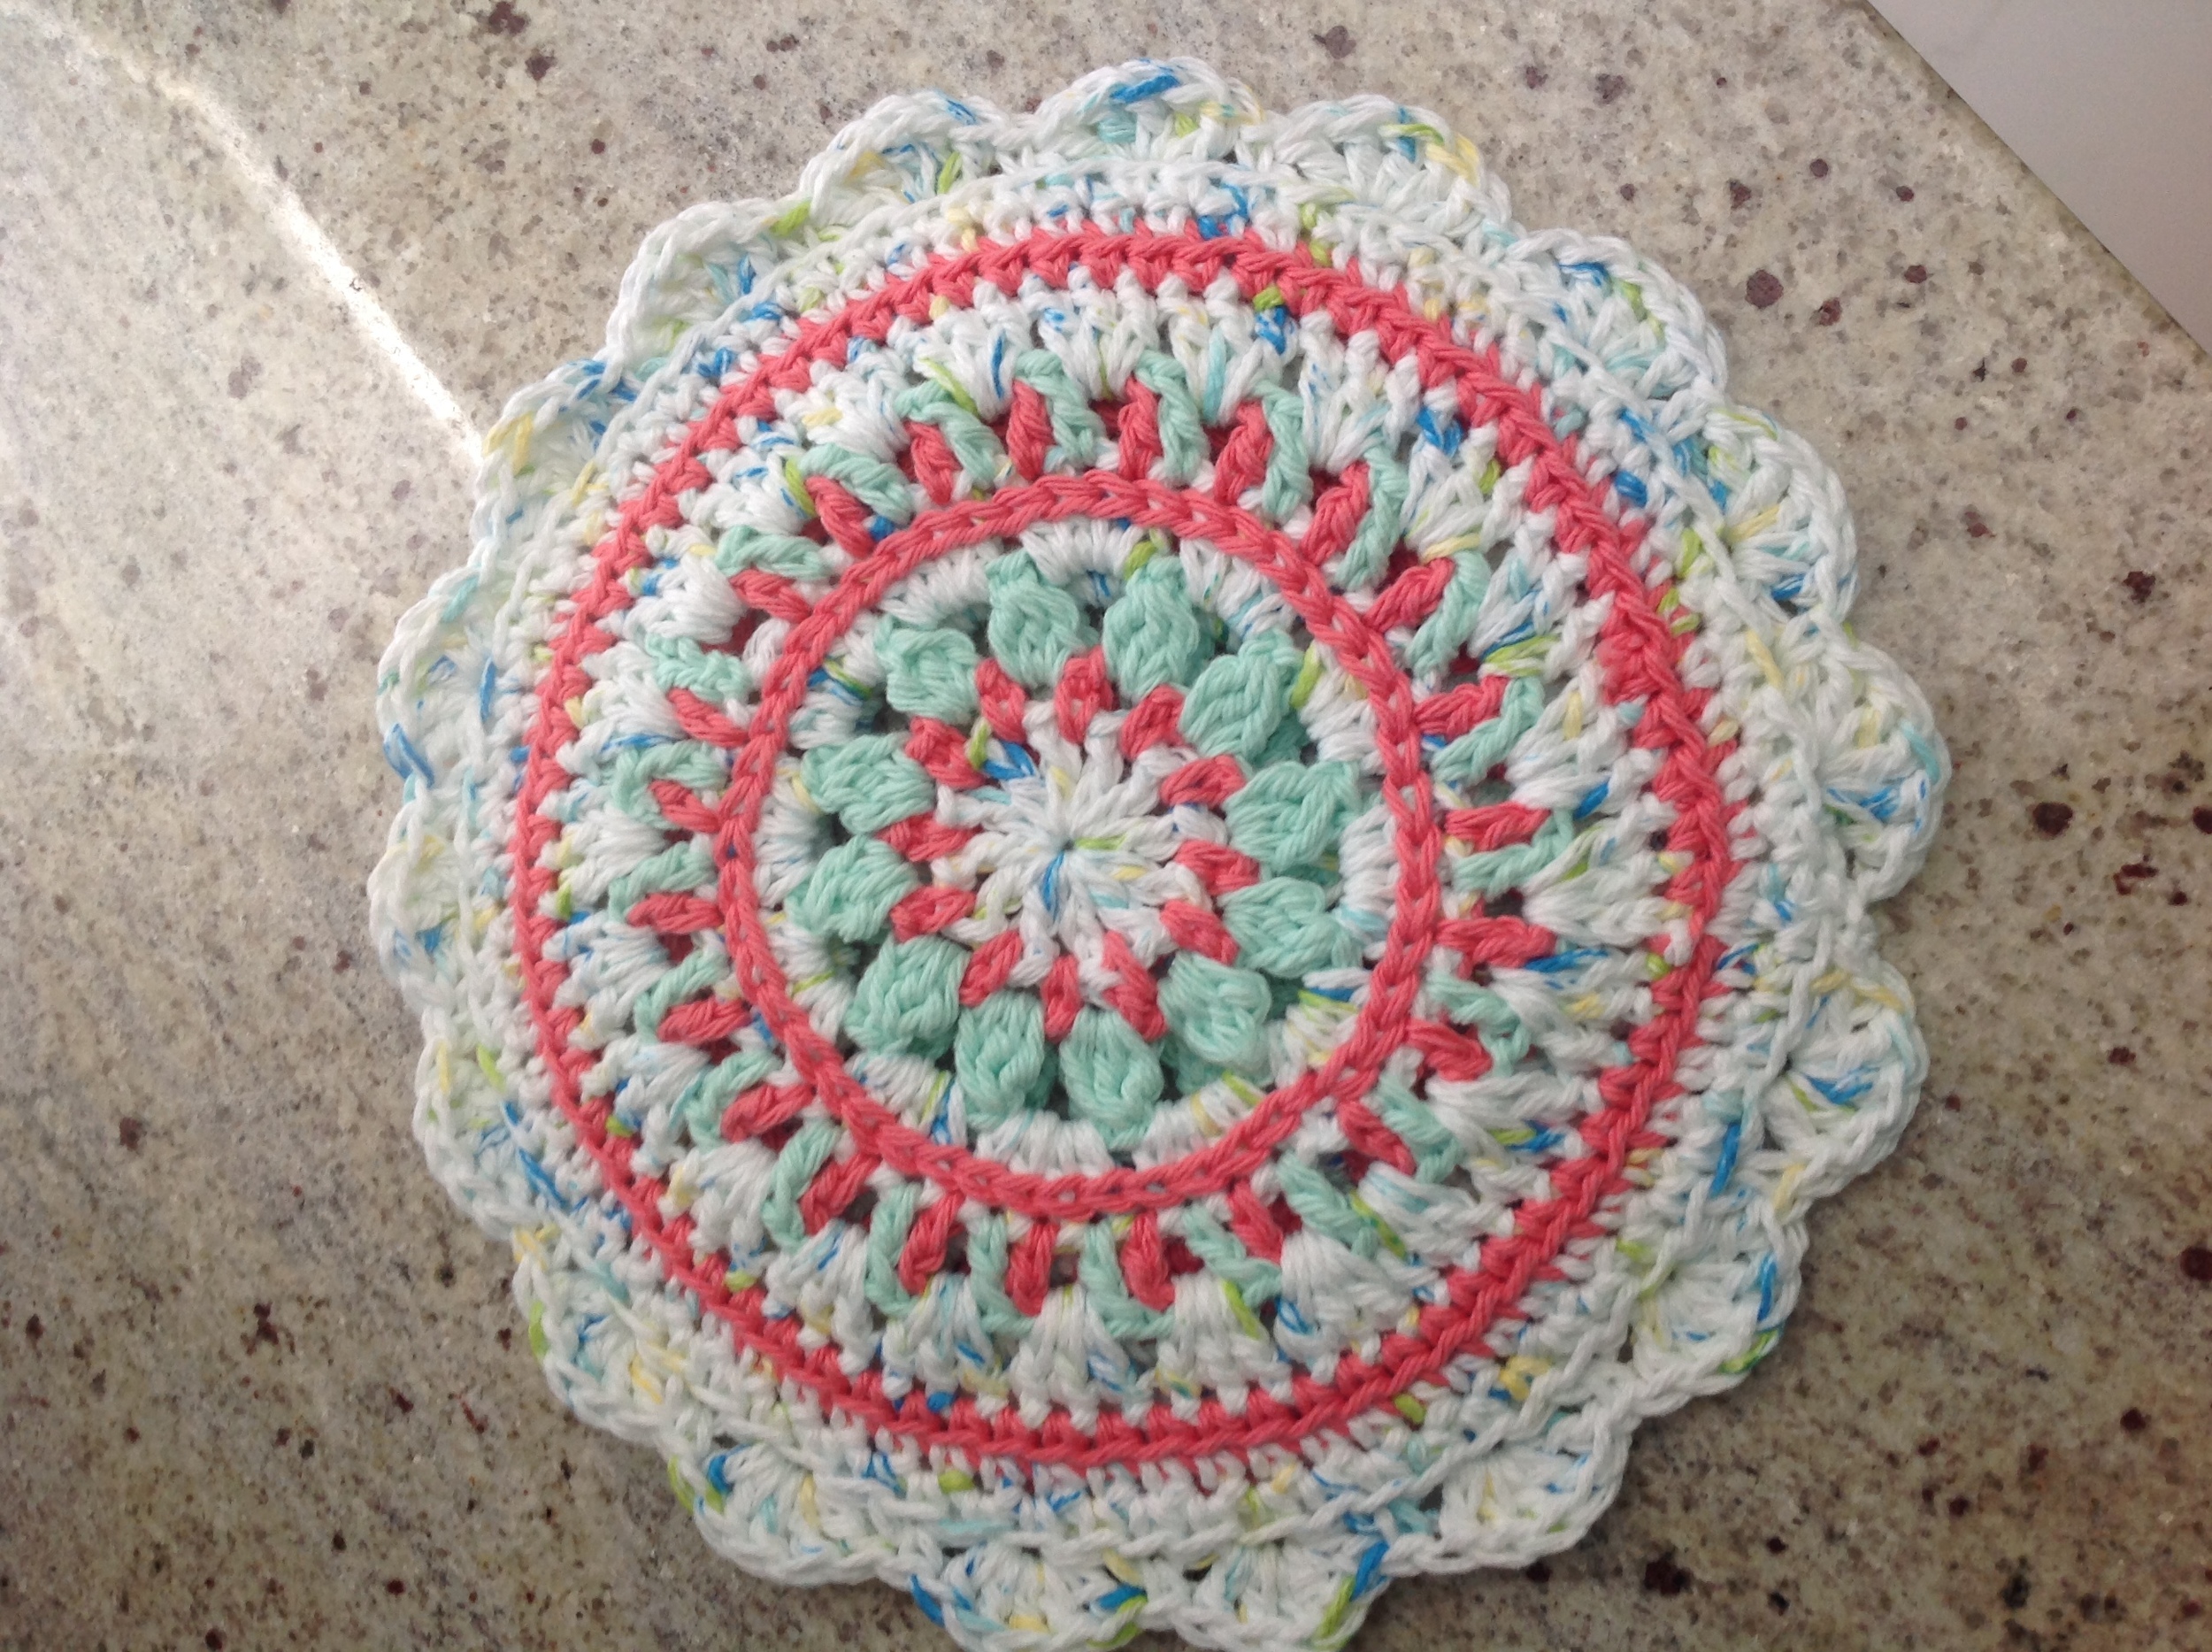
Recently, I saw some photos of broken Pyrex on one of my facebook groups. There's something about Pyrex and granite counter tops. If you don't set it gently on the counter top the Pyrex will explode into shards. I decided I'd make more potholders because of this. I came across this beautiful crochet pattern called Little Spring Mandela and decided to make some for my turquoise Pyrex I picked up over 4th of July weekend.

Crochetmandela

For now, when my Pyrex 024 is on the counter...it will safely rest on one of my crocheted potholders. Maybe I'll sell my extra potholders to buy more Pyrex or maybe I'll just keep crocheting for the safety of my Pyrex. Either way...I win!


Venora's Twist on the Little Spring Mandela

Follow the Little Spring Mandela pattern up to Row 7.

8th Round (new color): work sc into every space, join with a slip stitch to first sc, finish off

9th Round (new color): work sc into every space, join with a slip stitch to first sc, finish off

Make two of these! Place the wrong sides together and match them up as best you can.

9th Round (same color and join both pieces): sc , work *(1sc, skip one stitch, 5dc, skip one). Repeat * around, join with a slip stitch to first sc, finish off

September 18, 2015 /V
Pyrex 024, Turquoise Pyrex
Vintage Pyrex, Crochet
2 Comments

Searching for Pyrex Along the Shores of Texas

July 08, 2015 by V

Over 4th of July weekend, I decided to explore the coast of Texas. I did some research to see where we should go and ended up with a route from Houston - Surf Side Beach - Port Lavaca - Tivoli - Matagorda - Rockport - Corpus Christi - Victoria - Wharton - Houston. I made my five-day journey into one where I hunted for Pyrex during the road trip and stopped to eat when I was tired from searching for the perfect Texas beach or Pyrex. Some of the highlights to me were:

  • All the chemical plants in the Surf Side Beach area
  • How brown the beaches of Texas are
  • The Kemp Ridley turtles of Malaquite Beach (I hope to witness the release of hatchlings someday!)
  • The miles upon miles of beach sand you can drive upon on Padre Island
  • Selena's memorial statue in Corpus Christi

Along the way I stopped at these treasure troves:

Bohemian Rhapsody
134 W Milam St, Wharton, TX

J T's This & That
228 W Milam St, Wharton, TX

Grump-Pa's
4316 E. Houston Hwy, Victoria, TX

Laurent Street Antique Mall
1602 N Laurent St Ste D, Victoria, TX

Grapevine
105 Main St Tivoli, TX

Palacios Antiques and Resale
501 1st St, Palacios, TX

Sand & C Emporium Antiques
1017 E Concho St Rockport, TX

Betty's Trash To Treasures Too
4315 S Alameda St, Corpus Christi, TX

I particularly enjoyed these restaurants:

River Bend Restaurant and Tavern
1427 Fm 2031, Matagorda, TX

I really liked the large portions, sea food and the ability to watch crazy wild boars across the river feed the entire time we were enjoying our late lunch.

JJ's Little Bay Cafe
302 Hwy 35 N, Rockport, TX

I needed vegetables! And there was a very affordable soup and salad bar. The owner, Gary, was particularly friendly and his family is from Minnesota!

Ginger Cafe
7009 S Staples, 103, Corpus Christi, TX 

I sought out this place for veggies and had the mezze platter to start. The baba ganouj was really good! I also liked the beef shawarma...excellent spices and the beef was juicy and delicious!

Hester's Cafe (Six Points Location)
1714 S. Alameda St., Corpus Christi, TX 

Healthy brunch options and bottomless coffee. I liked the location that Chef Yadi chose (seemed to be in a more historic area) although later I spotted Hester's by the Museum and that's really good too. Then you'd be in close proximity to the USS Lexington and the Selena statute. 

Atomic Omelette and Grill
6313 Wooldridge Rd #10, Corpus Christi, TX

Of course I was a fan of the Hawaiian French Toast. You should try it - it's sweet enough that you don't even really need syrup! I also liked that somehow they managed to coat it with a bit of cornflakes.

I was hoping that Texas would offer some turquoise water and white sand beaches...but this didn't exist on our journey. The closest was probably Malaquite Beach where there was a bit of emerald beyond the brown waves that kicked on shore. It is nice to know that there are beach towns only one hour away from Houston where you can see colorful pastel houses and beach themed decor without getting on a plane.

Maybe nothing ever comes close to Hawaii. Until I return to Obamaland, check out the Pyrex turquoise 024 I found on my next blog post. It's the closest thing to paradise :)

July 08, 2015 /V
Comment

Blowing Leaves on a Spring Day

June 02, 2015 by V in Vintage Pyrex

A few months ago, I really wanted to buy something Pyrex in Houston. I have the worst luck here. I have only found one other item in a thrift store - the Snowflake Garland #403 Mixing Bowl (and a Dish Water Damaged (DWD) Blue 502 which totally doesn't count) and really wanted something more out of this city. 

Then, one day, while Yelping, I found out about Thompson's Antiques and drove there immediately. I started hunting and zeroing in on anything that resembled Pyrex. Then suddenly something appeared. On the bottom shelf, of a vendor who didn't sell much Pyrex, I saw this odd turquoise colored 024 casserole dish. It has a design with white leaves drifting in the wind. I had never seen it before, and being the novice that I am, turned it around and around with my hands to inspect it more carefully. Nope, never heard of this design or seen it. Maybe it's one of those "promo" items people keep writing about. I even carried it around the store for a few rounds of deep contemplation. Should I buy this? Is it worth it? Do I have too much Pyrex? Finally, it was nearing time to leave. So, I made a split second decision (ok, it wasn't) to adopt this strange Pyrex and give it a home.

Later, I find out this promotional Pyrex pattern is called "Blowing Leaves" and it had fetched over $300 on an eBay auction. I was so happy to know that my gut instinct to purchase this item was so spot on. :) 

I got over my fear of ruining such an expensive and sought after piece of Pyrex and decided to make a salad with it. For now, I'm not going to risk using this piece in the oven!

I made Musakhan to go with this and originally wanted to use one of my oblong Pyrex casseroles to have a complete Pyrex in Action (PIA) dinner, but a simple google search advised against using Pyrex when using the broil function.

What do you make in your 024s? I have one more of these at home that I will write about someday but I think I've only used them for salads.


I put all the ingredients directly into my Blowing Leaves Pyrex casserole. You should too! Any 024 will do!

Blowing Leaves Salad

2 large roma tomatoes, diced
1 small cucumber, diced
1 avocado, diced
2 cloves garlic, mashed
3 sprigs of green onion, thinly sliced
1/2 of a jalapeno (should be the size of a small pinky), REMOVE the inside seeds!! and diced
1 medium lime
1/2 medium lemon
2 TBSP olive oil, or a bit more according to taste
salt and pepper to taste

Combine all items. Squeeze the lemon and lime into the salad. Add olive oil, salt and pepper to taste.

You can't just make a salad without serving it with some food. As one of my brother's friends once said, "You don't make friends with salads!" And it's kinda true. So here's the recipe for the chicken dish I served with the Blowing Leaves Salad. Don't use Pyrex for this next dish because it requires broiling. It's better to use a metal pan when you're exercising that function of your oven! This is the "healthy" version...I tried not to drench it with olive oil though it probably tastes way better the "Palestinian" way. I modified Sawsan's recipe from Chef in Disguise.

Healthy, but tasty Musakhan - Palestinian Sumac Chicken with Sauteed Onions

4 chicken leg quarters

3 medium onions, chopped
1/4 cup sumac, or more according to taste
1/8 tsp cardamom
1/4 cup olive oil

pita bread
salt and pepper to taste

wedges of lemon, optional
chopped parlsey, optional
1/4 cup sauteed slivers of almonds, optional

Preheat oven to 375. Line a metal pan with foil and place the chicken legs on it. Generously add salt and pepper. Bake for 30 minutes.

In the meantime, preheat a large pan, add a bit of the oil into the pan and when it heats up, add the onions. After it starts sizzling, add the sumac, rest of the oil and salt and pepper. Cook until translucent about 10-15 minutes depending on how crowded the onion is in your pan.

In a small pan, heat up a bit of olive oil, add 1/4 cup of slivered almonds. When it starts sizzling, turn off the heat. Immediately transfer onto a dish with a paper towel to absorb all the oil. Be careful! Remove almonds here with slotted utensil so that the oil drains before you put it onto the dish.

On a plate, place one whole pita bread, scoop some of the sumac onion mixture onto it. Add a chicken leg and then scoop some more of the sumac onion mixture on it. Squeeze on a splash of lemon juice. For garnishments, add some chopped parlsey and sauteed almond slivers. 


June 02, 2015 /V
Turquoise Pyrex, Pyrex 024, Blowing Leaves Pyrex, Recipes
Vintage Pyrex
2 Comments
Uncle Sam and Dad somewhere near Kalihi and School St. circa 1975.

Uncle Sam and Dad somewhere near Kalihi and School St. circa 1975.

Brother, To Hawaii We Go

May 27, 2015 by V in Dad's Story

I have always wanted to write these stories down for myself. But lately, I find that I do many things for Kate because she's our next generation and I want her to know the story. So Kate inspired the process of capturing these stories. So one day when she can understand, she will know who we are and where we came from.

When I think of my father's journey, I always hear that deep male voice from every movie trailer I've seen. {lightening, scene of an ocean storm and Chinese men swimming} "In a world, where friendships span beyond the land, family ties are challenged and the risk of death is better than the life in front of you...a story of three brothers and their journey to freedom in America." {melodramatic music subsides} No one in Hollywood is going to make this movie anytime soon, Kate.

So this is for you.

In this trailer, there would be flashing images of my grandfather being paraded and ridiculed by the Communist regime for his supposed capitalist beliefs in the late 1950's, when his business was taken away by the government in 1954, my grandmother crying and my Dad at her side promising her they WILL see better days in 1960, stoic but heartbreaking goodbyes as the brothers are separated hundreds of miles apart for the "Down to the Countryside Movement" in 1965 and again in 1968, my father storing his treasured belongings in cookie tin containers with his friends before he sets off for his escape to Hong Kong in 1971, and my uncles and my father serving time in prison for their failed attempts to escape China. All these images float in my head from the countless stories I've heard my father and uncles share at our dinner tables growing up. People ought to know their story.

Last Christmas, I asked my Dad if he was superstitious. I remember watching these old men who are fortune tellers in Hong Kong (and in movies) outside of dusty temples who would shake these sticks with words written on them from their wooden cups. I asked my Dad if he's ever experimented with something this silly. To me, it only seemed like old women would go ask about the fates of their loved ones. Men, and rarely young men, would be into this type of "housewife" thing. "No, but...," started my Dad. He continued with a story about how in 1974 he and Uncle Sam, when they finally reunited in Hong Kong after separate attempted escapes from China, wanted to find out what a fortune teller would say about their chance to go West. Just for fun, like how boys be. My Uncle got a stick that indicated he would have a detour. My Dad got a stick that indicated a twist of fate. They just didn't know how it would play out. Back in 1973, they had started discussions on how they would eventually need to make their way to America. After escaping from China to Hong Kong, they knew that Hong Kong would eventually be returned from Britain to China in 1997. Why did they risk their lives with a seven day hike and five hour swim from from China to Hong Kong if eventually they'd be in the same position? 

They decided that my Dad should try his chances in the Netherlands and Uncle Sam would aim for the U.S. Then they would figure out which place is better and reunite accordingly. But how?

In their late night discussions, my Dad remembered that back in China my grandfather had mentioned an employee in his shop that immigrated to Hawaii. He wrote a letter to my grandmother asking if they were still in contact. Miraculously, my grandmother was able to get an address and my Uncle Sam started corresponding with this family. Uncle Sam wrote that they will not be a financial burden, they just wanted a sponsor to come to the U.S. and then they would be financially independent as soon as possible. He was an ambitious young man and just needed someone to help them make that bridge to the U.S. where he could escape the misfortune of their circumstances. The couple responded and said they would be willing to help. 

This "Uncle" and "Auntie" made several trips to visit us in California when we were growing up. As a child, I always knew that if it wasn't for them, my father would not be in the U.S. In addition to Uncle Sam, they would later sponsor my father. The way my Dad saw it was that they were forever our benefactors. As long as I could remember, each Christmas, he would send them $200 to thank them for the opportunity they gave him. In the 80's this was big bucks for our family of four and my Dad as the sole bread winner. When I was a teenager, my Dad told me that Auntie called one year to tell him to stop. She was going to rip up any future check he sends because my Dad has been doing this for over a decade and he returned whatever he thought he owed them. From this, I've learned that my Dad is the eternal optimist and chooses to remember people for favors they've bestowed and will let me judge later what I think of their character based on other facts that arise. It's really down to what you choose to focus on because really, do we ever get to know the whole story? 

As I grew up, I also grew to know that stories are never this simple. It wasn't poof! Uncle Sam and my Dad got a sponsor and they moved to America, had children and lived happily ever after. Details often get left out when stories are told to children and as we get older we learn to ask more complicated questions that might give us a better understanding of what actually happened.

Uncle Sam would head to Hawaii first in August of 1974. And Uncle Sam's fortune telling? They were spot on. A few days before his flight to the U.S. he got appendicitis and had to reschedule his flight. At the time, he was afraid that the U.S. might change their mind if he didn't head for Hawaii right away so before fully recovering he got on the plane to enter the U.S.

And whenever good things happen to you, envy also follows. A relative of this Uncle and Auntie was annoyed that they sponsored my Uncle instead of their own son. In spite, they wrote a letter to them and said my Uncle and my Dad were with the wrong crowd (they stole money and were criminals) in Hong Kong and should not be trusted. So when he arrived in Hawaii, jetlagged, in recovery and basically broke they told him they couldn't host him for more than a week. Sounds cheesy, but those were dark days for a young man who didn't speak English well and had literally no one in a foreign land. 

When my Dad made it to Hawaii in October of 1974, Uncle Sam made enough money to also buy him a mattress so that my Dad would have something soft to sleep on. My Dad would try to save 25 cents on bus fare by walking miles from place to place in search of a job. It took him two months to finally land a job cleaning for five hours a day at Palama Meat Market.  In the meantime, they subsided on my Uncle's salary and ate at home. They relied on public transportation and one day Uncle Sam didn't come home on time. My Dad's heart felt tight the entire evening worrying about what may have happened to his brother. It turned out that he had taken the wrong bus and ended up at a cemetery. He muttered to himself on his bad luck ("Aiyah!") and prepared to go to bed not realizing that my Dad spent the whole evening wondering if he'd ever see him again when he thought they were finally reunited in America.

And through these rough times in Hawaii, my Dad still has stories of making new friends and setting up a mah jong table at the beach. Locals would come and see what these Chinese boys were doing with this obnoxious game out on the Hawaiian sand. They bought Aloha shirts, hung out at Ala Moana Beach Park, took pictures at Kapiolani Park and tried to fit in. The Uncle and Auntie kept their distance, but slowly started to see that these boys were good boys.

Auntie, Uncle Sam, Uncle and Dad at Kapiolani Park circa 1975.

Auntie, Uncle Sam, Uncle and Dad at Kapiolani Park circa 1975.

Dad and a friend at Magic Island circa 1975.

Dad and a friend at Magic Island circa 1975.

The seasons passed on the island and sometime in 1978, right when my Dad announced he wanted to move to California in search of better economic opportunities, Auntie took my dad aside and showed him the letter that was written to her about my Uncle Sam and my Dad. My Dad shook his head at the result of the words that were written. He understood from their perspective the risk of taking in a stranger but also knew the hardship that it caused him and my Uncle with the only people they knew keeping a distance from them when they needed help the most. When I heard the story, I wanted to shake those mean spirited people in Hong Kong. I was young so I raged - who does this? Why would anyone want to make it so hard for someone for no real reason? And so I learned from a young age, people can suck. ("Diew, right?") So you forgive those who suck, but always remember those who helped you out along the way. No story or person is perfect.

Dad, Auntie, Uncle and friends in Honolulu circa 1975.

Dad, Auntie, Uncle and friends in Honolulu circa 1975.

So sometimes growing up, when misunderstandings happened between our families, my Dad always chose to stick to the side of his brother. Because no one can take away the bond formed from those moments when all they had were each other in Hawaii. And they didn't do none of that fortune telling stuff ever again either.


A typical meal from these two brothers in the fall of 1974 because my Uncle Sam worked at a restaurant and could take home the "body" of the Peking Duck after the crispy skin was removed and served to customers with hoisin sauce, slivers of green onions, cucumbers on soft bread (I like to say they are Chinese Tacos!). Each day, he got to bring home two ducks, so my Dad, while looking for work, ate duck for two months. Every day. 

Peking Duck and Yu Choy Hot Pot

1 whole skinned Peking duck, cut into pieces
1 bunch of washed yu choy (you can also use gai lan or other Chinese greens), cut into two inch pieces
splash of oil
salt, pepper and soy sauce to taste

In a medium sized pot, layer the yu choy on the bottom, splash some oil in it and layer the duck on top. Add water until it reaches the top of the yu choy. Boil until done. Add salt, pepper and soy sauce to taste.

Serve this with jasmine rice!


May 27, 2015 /V
Recipes
Dad's Story
10 Comments
Stacie Stukin's Kitchen

Stacie Stukin's Kitchen

My Dream Turquoise Kitchen

May 26, 2015 by V in Kitchen Appliances

When I saw Stacie Stukin's stove in the Saveur Magazine last summer, I think I stared at the photo for ten minutes without blinking. Where did she find this stove? What is it? Then I saw the perfectly placed bookshelf and the fact that she not only has a Vitamix but also the container that fits under the counter. To top it all off - she's a journalist. In another life, I want to be her!

Now, I want to slowly transform my kitchen...and have been thinking about it for a few months now. I'm moving slowly in this direction as it's a huge time commitment as well as financial strain. In the meantime, I'm more focused on acquiring the right appliances for this "dream vintage kitchen" in Golden Valley, MN.

I have been debating whether to buy a vintage mixer or a brand new KitchenAid model that's made to look vintage. I don't want to buy an old one and run into repair issues, but then I hate the idea of spending so much money on something that's made to look "old" so this is a tough decision! And I'll definitely let you know when I've made up my mind.

Here's what I'm talking about:

Vintage Sunbeam Mixer

credit: http://homeguides.sfgate.com/

credit: http://homeguides.sfgate.com/

KitchenAid Mixer

Then there are these hand mixers that I think are so adorable. Recently, someone in Minneapolis offered to sell me hers! I'm thinking I'd rather go with the vintage version than the brand new KitchenAid hand mixer too.  I just inherited a cool avocado colored one from my Dad who just retired and moved to California and didn't want to take all the 1970's kitchenware he accumulated with my mother during their time together. I have such good memories of him making sponge cake with this mixer that I cannot give it away. So this turquoise one will have to wait.

Vintage GE Mixer

KitchenAid Hand Mixer

And what about a toaster? I need a cool turquoise toaster too. BUT, my Dad also just gave me his cool stainless steel one. Before this gift, I did see this Smeg toaster recommended on I am a Food Blog and I totally wanted it. Maybe next year.

Vintage Westinghouse Toaster

Smeg Toaster

smeg toaster.png

Decisions. Things. Too many choices.
May 26, 2015 /V
Kitchen Appliances
Comment

Lo-J means Loquat Jam 'Round Here

May 13, 2015 by V in Vintage Pyrex, Pyrex Butterfly Gold

Foraging is quite a dangerous activity in the urban jungle. You never know what pesticides are being sprayed on what you're picking or if some grumpy old man is going to run out of his front door yelling at you with a shot gun. I guess I justify this danger by remembering that I most likely consume harmful toxins every day – from the laundry detergent I use on my pillow cases to the highly processed foods that I have to, ashamedly, confess I love. AND finally I run the risk of dying in a road rage mishap anyway...being a stereotypical Asian female driver on the roads in Houston, it's likely that I'll be at the risk of angering a Texan who loves the 2nd amendment.  In this spirit, what’s wrong with ingesting a few more bad things?

I thought it would be good to take the photos of the loquats in my Butterfly Gold Cinderella 444 bowl because I like the layers of repeating colors. The color of these loquats are totally reminiscent of this Pyrex pattern. And I didn't use any photo filters in this post. The spring is here! And color actually does not need to be messed with or maybe that's just my excuse for being too lazy!

LoquatDisplayPyrex

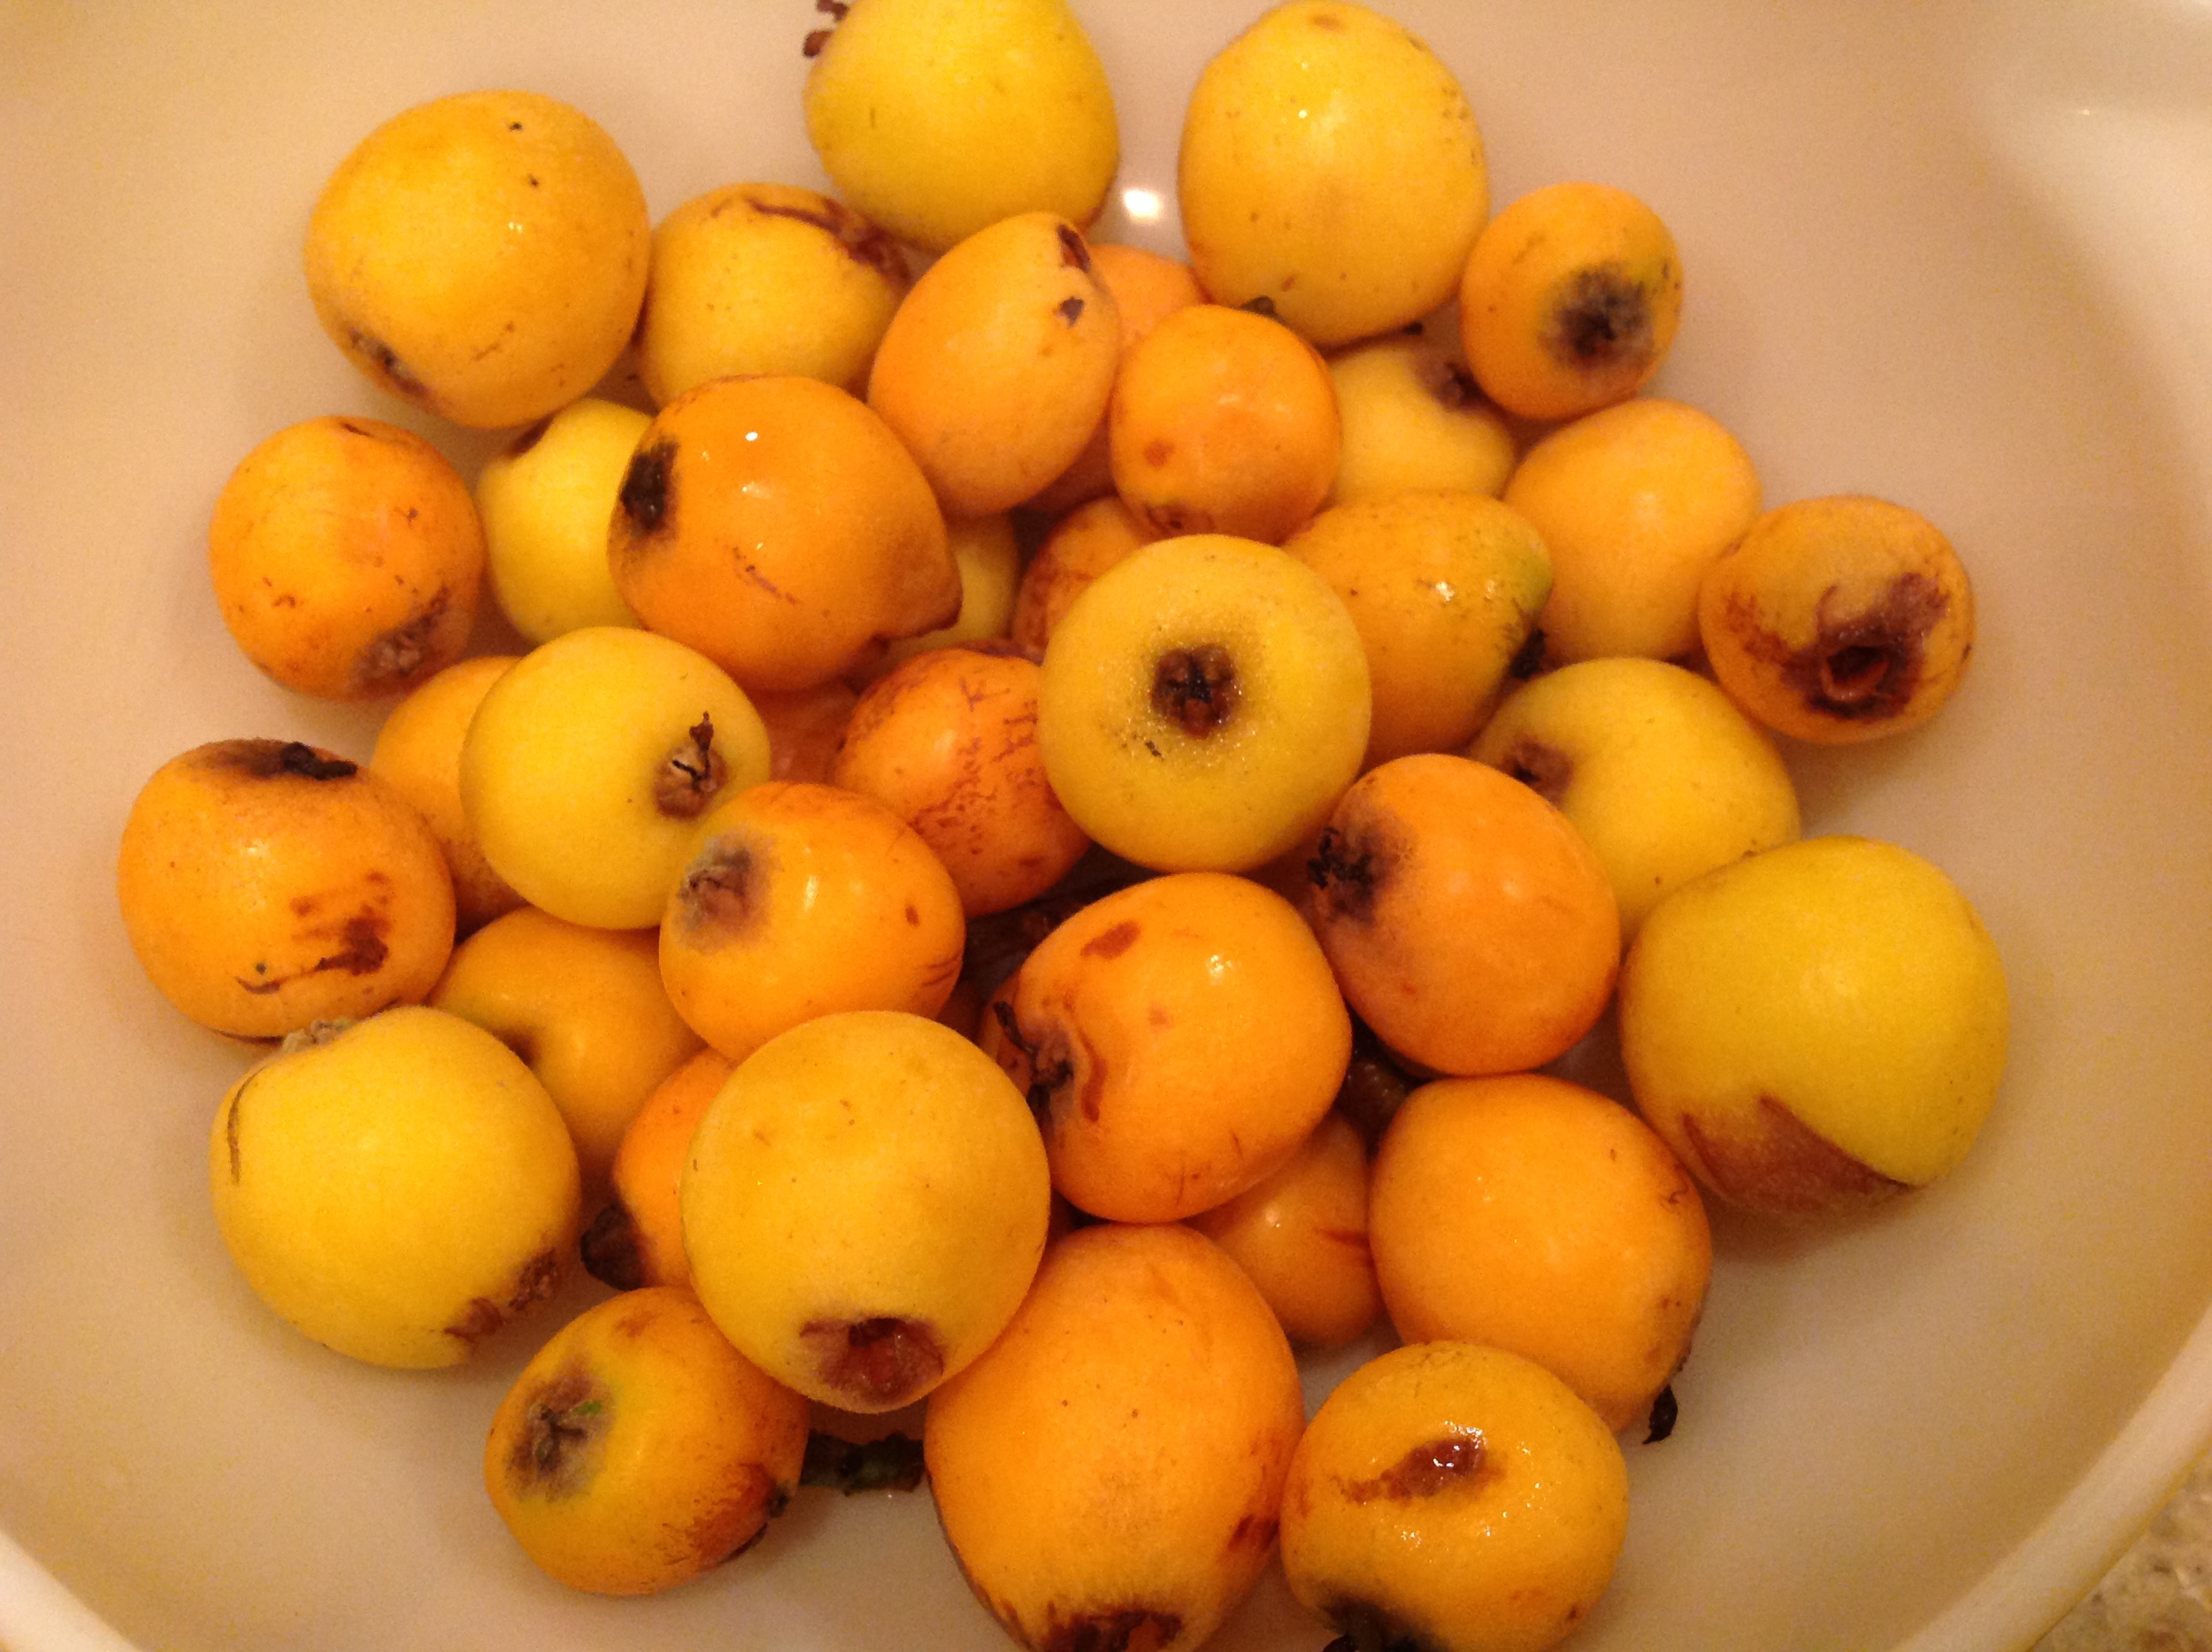
Loquats are rampant around Houston right now. I see these brightly colored fruits on trees all over the city. On sidewalks, perched near the windows in peoples’ houses, and along some busy city streets there are some gigantic branches peeking over tall fences. Trying to exercise a bit of the foraging etiquette I know…I don’t go into people’s property, but if I see them draped into the public walk way, it’s unpopularity evidenced by so many fruits rotting on the ground, then we’ll pick some and take them home. Save it from its misery so to speak.

Now I’ve visited a few of these trees around the city and it seems that they vary in color and flavor. Some are more yellow than orange (may be due to how ripe it is as well as the tree). Some are smaller in size than others. Some have bigger seeds than others. And some are WAY sweeter than others. We’re still novices when it comes to the loquat, but at least now I have a few secret places around town if I ever want some more of these cute little fruits. Fine, this isn’t quite as exciting as having a special morel spot, but one day I’ll get to that game.

I used some of my Lo-J as toppings on my muffins. I put a dollop of the jam in the middle of each muffin before putting them in the oven. There are so many ways you can eat this - with bread and cheese as a fruit preserve on the side or on your favorite brioche. It's all going to depend on how you party in the kitchen.


Easy Lo-J (Loquat Jam) 

2 cups deseeded loquats, coarsely chopped
1/4 cup water (or a little more according to the consistency you want)
1/8 cup sugar
1/8 cup brown sugar
1/2 tsp cinnamon
1/4 tsp cardamom 
1 tsp vanilla extract
1/3 cup dried cranberries, or other dried fruit (optional)

Stew the loquats in a covered pot, with the water, sugar, and brown sugar until the liquid is reduced and the fruit is tender, but not brown (or it will sort of end up like mine! even though it still tasted fine.  Add all the remaining ingredients, and allow to cool covered. 

You can only keep this in the fridge for up to a week. But you most likely won't have a problem figuring out how to incorporate it into every meal!

May 13, 2015 /V
Butterfly Gold, Cinderella 444, Pyrex 4 Quart
Vintage Pyrex, Pyrex Butterfly Gold
2 Comments

Rolling with the Rajasthanis

April 27, 2015 by V in Vintage Pyrex, Travel

I followed Sumina to her family's kitchen in Jodphur, Rajasthan. She invited me to come join her family for the Gangaur Festival. Many guests were expected for the multi-day festival so they hired help to feed the guests. In India, some type of grain was eaten with every meal and where people are largely vegetarian - this was an important aspect of the meal. There were really two questions every day: 1) Are we eating puri? Or roti? 2) And with what vegetable?

Everyday, I watched the kitchen staff make the roti or puri from scratch. Sometimes, I tried to participate. It was quite the endeavor for me to roll a perfectly circular shape. Sumina said you get five rolls to get the shape. And I agree with her. After that, it just gets too flat and too big. You have to get the pressure and the angle right to do this quickly and perfectly. Or face a bit of judgment from the ladies, but all in good fun.

On the day the guests came, the puri making migrated outdoors onto the Jodphur blue roof top deck. There, we had more space to sit on the floor and roll hundreds of puri for the guests that evening. Once the dough was made, we even divided the duties into portioning out the dough, shaping it into a ball, rolling it into a circle, passing it to the fryer, and frying it. We had quite the production line going. It was nearly a hundred degrees outside and we were all sitting next to a propane tank with a hot wok of boiling oil, but in India, somehow you ignore the same dangers that you would balk at in America.

I always think breakfast is such a personal thing. Everyone has a unique routine and a different idea of what breakfast means. My go-to routine was always the lack of one so sitting down for a prepared breakfast every day was such a treat. I learned the joy of not reaching for a granola bar in the pantry. One morning we had Upma, a savory semolina based dish mixed with veggies. Another morning, we got these roti sandwiches filled with a cauliflower and green onion medley. Sumina says you can easily get the latter at most Indian restaurants in the U.S. I have yet to sample outside of the Bhatti household.

unnamed (13).jpg

What I thought was the most fun about Jodphur was how people shopped for groceries. And by that, I mean how they actually have groceries delivered to them! Every day a vegetable cart comes down the street between 11 am and 3 pm and people can buy what they need directly from this grocer on wheels!

Dinners were always various veggie dishes with different grains and spices. Several families hosted us for dinner and they all had stainless steel ware to serve their food. Many of them are passed down from generation to generation. Sumina's grandfather passed on some plates engraved with his name that her father (Uncle) still uses. In this case, stainless steel (although less attractive) is much more durable than vintage Pyrex.

And the sweets! Indians LOVE sugar. I thought that every time someone asked me if I wanted sugar in my tea or chai. At first, I said a little...and soon figured out it was much better to just go "naked" and sneak in the sugar myself at a later time.

Desserts in Rajasthan are often a combination of different types of flour, sugar and spices. Two that I really found notable were 1) bars that had nuts, raisins and spices 2) donuts filled with crystalized sugar and coated with a sugar icing. If you know their real names, please comment below!

Uncle introduced me to the "cheeku" fruit which I've never noticed before. 

Now, back safely in the comforts of America, I still miss some of the food that was accessible to me all the time while in Rajasthan. I decided to make a kitchen sink style Upma for myself. I had farina, but didn't have semolina, mustard seed or dal. I think the spirit is still there!


Upma

1 cup roasted semolina/sooji/rava/farina (fine variety)
1 medium sized onion, chopped finely
1 can of mixed vegetables
½ inch ginger grated or chopped finely
2.5 cups water
½ tsp cumin seeds/jeera
1 to 2 tsp sugar (optional) or add as required
2 tbsp chopped parsley
2 tbsp oil or ghee
salt as required

Heat a pan and add 1 cup of the grains you chose. Begin to roast it, stirring often while roasting it. The grains should become fragrant and start to look dry, separate and crisp. Make sure not to brown it and remove it from the heat and transfer to a plate and keep aside.

In a pan, heat 2 tbsp ghee or oil. Add 1 tsp cumin seeds until fragrant, then add the finely chopped onions and saute the onions till they become translucent. Add ginger and saute for a minute. Add 2.5 cups water to this mixture. add salt as required. Then if using sugar, add it. Stir well. On a medium to high flame, heat the water and let it come to boil. Then, lower the flame to its lowest. Add the grain in 4 to 5 batches with a spoon. Once you add the grain, stir immediately. The grains will absorb the water. Add can of mixed vegetables. Cover and allow the grains to steam for 2 minutes. Switch flame and let it sit for a few more minutes.

Just before serving, sprinkle with parsley and serve it with a side of lime.

For the record, the Pyrex Space Saver is what I used to store leftovers! I can't seem to find a photo of it right now, but may edit the post to show you later.

April 27, 2015 /V
Pyrex Space Saver
Vintage Pyrex, Travel
1 Comment

Hello Chocolate Mousse

April 06, 2015 by V in Vintage Pyrex

The first written record of chocolate mousse is from 1892. If you like chocolate mousse, you can claim that you have quite the taste buds for all things antique. I have never made chocolate mousse prior to trying this recipe and then I made it three times within the next two weeks. Mostly because I bought the pound plus chocolate bar from Trader Joe's (it's only $5) and a huge jug of heavy whipping cream from Costco for this recipe. I had so much leftover ingredients that I decided to make one more batch. And then another.

unnamed (1).jpg

I decided to make chocolate mousse with my Snowflake Blue #403 2.5 quart Pyrex mixing bowl I recently found at Goodwill in Houston. It greeted me as I walked through the front entrance. I was pretty happy since I never find Pyrex out in the wild in Houston. The best place for Pyrex I've seen so far is at the Old Blue House Antiques. The lady behind the counter (who I think is the owner) said she's known as the Pyrex queen. There's a pretty sizable collection and there are items I've only seen online and never in real life. So if there's a hard to find piece you're looking for - it may very well be at this store. Although, it's a bit pricey.

unnamed2.jpg

I also came across the cutest Hello Kitty dessert bowls at Rice Brothers Coffee Co. It's a combined coffee shop and thrift shop owned by two brothers. They are sharing the space so they can each go after their dreams. The proceeds of the thrift store goes towards a job training program for homeless men. I love going there to see what new things are in the store and find that it's clean, fun and welcoming. 

Make this and let me know how yours turn out!


Chocolate Mousse
Adapted from Cook’s Illustrated, 2006

8 oz. bittersweet chocolate, ideally 60% cacao, finely chopped
2 TBSP Dutch-processed cocoa powder
1 tsp instant espresso powder (or use 1 1/2 tsp of instant coffee)
5 TBSP water
1 TBSP brandy (optional)
2 large eggs, separated
1 TBSP sugar, divided
1/8 tsp salt
1 cup plus 2 TBSP cold heavy cream

Combine the chocolate, cocoa powder, espresso powder, water, and optional brandy in a medium heatproof bowl. Place over a saucepan filled with 1 inch of gently simmering water, and stir frequently until the chocolate is melted and the mixture is smooth. (I just use the microwave and do this in 25 second intervals - make sure it doesn't boil - and stir until the chocolate is melted) Remove from the heat.

In another medium bowl (I used my Pyrex bowl for this step), combine the egg yolks, 1 ½ teaspoons sugar, and salt. Whisk until the mixture lightens to a pale yellow color and thickens slightly, about 30 seconds. Pour the melted chocolate mixture into the egg mixture, and whisk until combined. Set aside for about 5 minutes, until just warmer than room temperature.

In another medium mixing bowl, beat the egg whites on medium-low speed until frothy (I use a hand mixer). Add the remaining 1 ½ teaspoons sugar, and beat until soft peaks form when the whisk is lifted. Using the whisk, stir about ¼ of the beaten egg whites into the chocolate mixture, to lighten it. Then, using a rubber spatula, gently fold in the remaining egg whites until only a few white streaks remain.

Wipe clean the bowl from the previous step and whip the heavy cream at medium speed until it begins to thicken. Increase the speed to high, and whip until soft peaks form when the whisk is lifted. Using a rubber spatula, fold the whipped cream into the mousse until no white streaks remain. Spoon into 6 to 8 individual serving dishes - Cover with plastic wrap, and refrigerate until firm, at least 2 hours and up to 24 hours.

Yield: 6 to 8 servings


April 06, 2015 /V
Vintage Pyrex, Chocolate Mousse, Snowflake Garland #403, PIA
Vintage Pyrex
Comment

Mixing Old and New

March 08, 2015 by V in Kitchen Appliances

In 2014, I spent a lot of time in my kitchen. Mostly trying to figure out what I could live without. And more time trying to figure out what I should add. I try to shop at thrift stores when possible when I need kitchen items because  if something still works there's no real need to buy it new and generate more waste. Last year, I found myself repeatedly reaching for the same items and wanted to share them with you.

1) Le Creuset Signature Enameled Cast-Iron 5-1/2-Quart Round French (Dutch) Oven in Caribbean - I bought this in 2011 when I was at an employee event at Cooks of Crocus Hill in Edina. I had been eyeing it for a while, but having been in the store for an entire evening at a team building event, I didn't have enough will power to turn down the extra 20% coupon they offered us and splurged on this pot. I'd like to say I got my money's worth because I do use it a lot. I make a lot of soups, curries and even warm salads out of this pot!

2) Pyrex from my mother's kitchen - We inherited a set from my mom who got this as a gift from the Pang's. I still remember them bringing us the large box of Pyrex gift set on one of our trips to California in the 90's. They were the best glassware we had in my our family for years. I started using them a lot more last year after hearing about how much cheap plastic can contaminate your food. This seems like a good alternative because once you put your leftovers in a container, you're most likely going to be reheating it in the container too. 

3) Charles Viancin silicon covers - These are the cutest things EVER. If you're the environmental kind (which I try to be) it really does save on plastic wrap. I use them to cover up my vintage Pyrex mixing bowls (not the Cinderella bowls). They make opening up the door to the refrigerator really fun.

4) Aeropress Coffee and Espresso Maker - I just got this in January (it was a very belated birthday gift) and I use it all the time when I'm making a cup of coffee for myself. With over 3,600 reviews on Amazon, you really can't go wrong. It's also totally easy to clean. You just pop the coffee grounds right out into the trash. I also like how small the filters are - about the size of a $1 U.S. coin - so it also feels to me like I'm really saving trees. I was also impressed that it was featured in The Kinfolk Table as a coffee recipe. I guess people really love it. I do.

5) Chemex 10-Cup Classic Series Glass Coffee Maker - One of my favorite holiday gifts that I received last year was this Chemex. I had been coveting this for years. It is so aesthetically pleasing to the eye and just I just love having this on my counter. What I love more is everyone standing around me while I make the coffee to watch how the process works. That way, I get to spend more time with the people I'm making coffee for and turn it into a group activity.

6) Rotary Egg Blender - I found mine at a thrift store near my house (you can see if I came across any that I can sell to you at my Etsy store) and I just love it because it's easy to clean. You can drop the whole thing in the sink...no electrical cords! I most recently used it to beat the eggs when I was trying to make this Old Fashioned Waffles recipe from Mimi Thorrison. It was the first Mimi recipe I've ever tried and it was pretty awesome. 

March 08, 2015 /V
Kitchen Appliances
4 Comments
unnamed (9).jpg

Weekend Meze or Mezze or Both

March 07, 2015 by V

When given the choice, you should take both.

Weekend brunches shouldn't be about choices, but what you can fit on the table. This doesn't really help with the waist line, but it is a lot of fun. I grew up with dim sum - the Cantonese brunch where you get served small portions of everything.

Back when we lived in Eau Claire, my parents would often drive 1.5 hours on the weekend to the St. Paul Peking Garden on the U of M campus just to get their dim sum on. That really was my first view into the U of M campus (well, and there were the late night drives to Village Wok...after they closed down their restaurant at 9 pm, we would drive 1.5 hours to Village Wok and then back on the same night...all this for Chinese food...on a school night!) I borrowed a book from the local library on the art of making dim sum to save us these voyages in the mini van. I'm not sure if it was my being a teenager in the culinary world or if the instructions were just plain terrible - but I could never make the rice dough clear, thin and chewy for the Ha Gao (Shrimp Dumplings) or the flaky crust for the Dan Tat (Egg Tarts). My parents told me dim sum chefs in Hong Kong only make one or two items. They train their whole lives for that so I had no business thinking I'm going to glean this type of knowledge out of a paperback cook book. In Eau Claire. Fine. 

Mezze, on the other hand seems quite easy to make. According to wikipedia, mezze is a selection of small dishes served to accompany alcoholic drinks as a course or as appetizers before the main dish in the Near East and the Balkans. In Levantine, Caucasian and Balkan cuisines meze is served at the beginning of all large-scale meals. 

I like the concept of mezze for brunch. On my table, I usually have the following items: 1) a bowl of mashed up hard boiled eggs with salt and pepper to taste. Drizzled with olive oil. In that order. 2) a bowl of mashed avocado with lime, salt and pepper to taste. Drizzled with olive oil. Do you see a pattern? 3) a bowl of labne with salt and pepper to taste. Drizzled with olive oil. Always served with slices of vegetables that's in the fridge. Mostly crunchy Persian cucumbers and Roma tomatoes (sprinkled with salt if you wish). Oh and some pita bread.

This is where vintage divided casserole dishes are so awesome. I often serve my mezze in them because they're perfect for small portions! Or sometimes even labne on one side and cucumbers on the other. Really, the possibilities are endless. I have many Pyrex divided casserole dishes, but here is the ONLY Glasbake divided casserole dish that I have. I decided I needed to focus my kitchen space on Pyrex. There's just too much good stuff out there and I have to try to remain in control of hoarding. It's very hard to do. Fire King and Glasbake has some pretty cool retro patterns.

So, it used to be store bought pita bread until I was listening to Lynne Rosetto Kasper and she was talking to a certain Jeff Hertzberg who is a medical doctor but somehow perfected a dough recipe that required no kneading and could be kept  in the fridge for up two weeks (he confessed it took 10 years of trial and error). Whenever you feel like fresh bread (all the time, right?), you can just pull a bit out of dough out, shape it and bake it.

So this weekend, after several failed attempts at pita bread that looked like flat bread, I finally got the pita to "puff"!


Pita

Some additional notes for making the pita bread not available in the link above.

Preheat oven to 450°F and also put in the pan you will use for your pita. (I used a sheet pan because I don't have a pizza stone.)

Right before the oven hits 450°F, take out some dough about the size of a medium orange. Be careful not to play with the dough too much. Quickly pat it with flour so it's easy to handle, shape it into a ball and roll it to about 1/8 of an inch thick.

Put in on the preheated sheet for about 5-8 minutes or until the top is puffed and slightly browned. Wrap in bread cloth until you are ready to serve.

It may not always puff! But it will still taste good.


March 07, 2015 /V
2 Comments

Treasures from Grandma Ranger

March 03, 2015 by V

Sometime at the end of 2012, my interest in vintage Pyrex bowls skyrocketed. More than a hundred years ago, when Pyrex was introduced into the market, it really revolutionized home cooking. For the first time, people could serve out of what they made their food in. The glassware could be taken from the oven, onto the table for serving, and then used as storage in the fridge or freezer. Imagine having to use separate vessels for each step of the cooking process! And the amount of dishes to do. Without a dishwasher. The type of colorful Pyrex that I like was introduced in 1947. All this information I found on Pyrex Love .

In April 2013, my grandmother in Hawaii gave me her 1 1/2 pint (#401) Amish Butterprint nested mixing bowl (not pictured in this post). She doesn't quite remember how she inherited it, but gave some indication that it was most likely from relatives who were moving and didn't want these heavy glass bowls clogging up space in their kitchen cabinets.

Legend says that the Amish Butterprint print appeared somewhere between 1957 to 1959.

unnamed (4).jpg
unnamed (1).jpg

Now begins the story of how I acquired my second piece of Amish Butterprint Pyrex:

In December 2014, while driving from Los Angeles up to San Francisco on the Pacific Coast Highway in a rented red Camaro, I stopped in Cambria for lunch. While walking around Main Street, I stopped in at Granny Had One Antiques & Collectibles. Among the stash of Pyrex available for sale, there was the 1 1/2 pint (#502) size refrigerator dish! It was priced less than the other ones because it didn’t come with the glass lid (they break easily, so I often find Pyrex sold without the lid). Later, back in Minneapolis, I found the matching glass lid at a thrift store near my house for 79 cents!

Lids aren't air tight but it's nice to have a complete set when you know it's out there.

Lids aren't air tight but it's nice to have a complete set when you know it's out there.

The best use of this Pyrex dish so far is to make baked treats. The 9X5 loaf pans are often too big. There are too many recipes that I want to try, but I don’t have a good inventory system of people lined up to eat the goodies when it's fresh out of the oven.

Most recipes, however, are not made for the #502 refrigerator dish so I came up with my own...and I promise to share more when I tweak other recipes to fit my dish! What else do you bake in your Pyrex refrigerator dishes?


Banana Nutella Bread 

2 medium bananas
½ cup brown sugar
¼ cup unsalted butter, melted 
¼ cup milk
1 large egg
1 tsp vanilla extract
1 cup flour
1 tsp baking powder
1 tsp baking soda
¾ tsp salt
¼ cup nutella

Preheat oven to 350°F and butter the #502 size refrigerator dish.

In a large bowl, mash bananas with a fork/potato masher until smooth. Stir in the melted butter (make sure it’s cooled). Then add in the brown sugar, butter, milk, vanilla, and large egg. Mix together. In a medium bowl, mix the dry ingredients together. Then slowly add the dry ingredients into the wet ingredients and mix till its combined. 

Pour ¾ mixture in the refrigerator dish. Add spoonfuls of Nutella into the refrigerator dish. With a knife, make swirls between the Nutella and the batter. Add the rest of the batter on top of the Nutella. Try to cover up the Nutella, otherwise, it gets a bit too browned from the oven.

Bake for 40-45 minutes or until you can stick a wooden chopstick (or whatever tester  you use) into the center and it comes out clean.

Remove from oven and cool completely on a rack. Slice and serve!


March 03, 2015 /V
Pyrex, Baking, #502, Vintage Pyrex
3 Comments
hawaiian sweet potato

Dreaming in Purple

December 19, 2014 by V

I love all shades of purple. In clothes, stationary, eye shadow and especially food. My hanai grandmother also shares this same sentiment for purple and every time I travel to her, we never fail to remind each other that we share a favorite color. But really, we share more than that. We both love books, pretty pens, and thrift shopping.

I am connected to my hanai grandparents through my father who immigrated to Hawaii in October of 1974 from Hong Kong. My grandparents, now retired librarians, had taught the English courses that my father attended when he was off work and he remained close to them even when he left for California in April of 1978 for better economic opportunities. They kept in touch by letter correspondence and when I was old enough to write, the responsibility was passed on to me. For more than twenty years, I addressed them as Uncle and Auntie, a term most Hawaiians call the elders whether they're related, but as they moved onto their retirement years - we went with Grandma and Grandpa. So this is the quintessential hanai relationship, one where through fate you become bonded as a family rather than through blood or legal ties. I've always been very fond of my grandma, feeling in many ways, that she's the calmer version of who I'd like to be. She also isn't the type of Asian grandmother, as she declared recently, that asks me questions because she wants to tell everyone else at the retirement home. She asks because we are family.

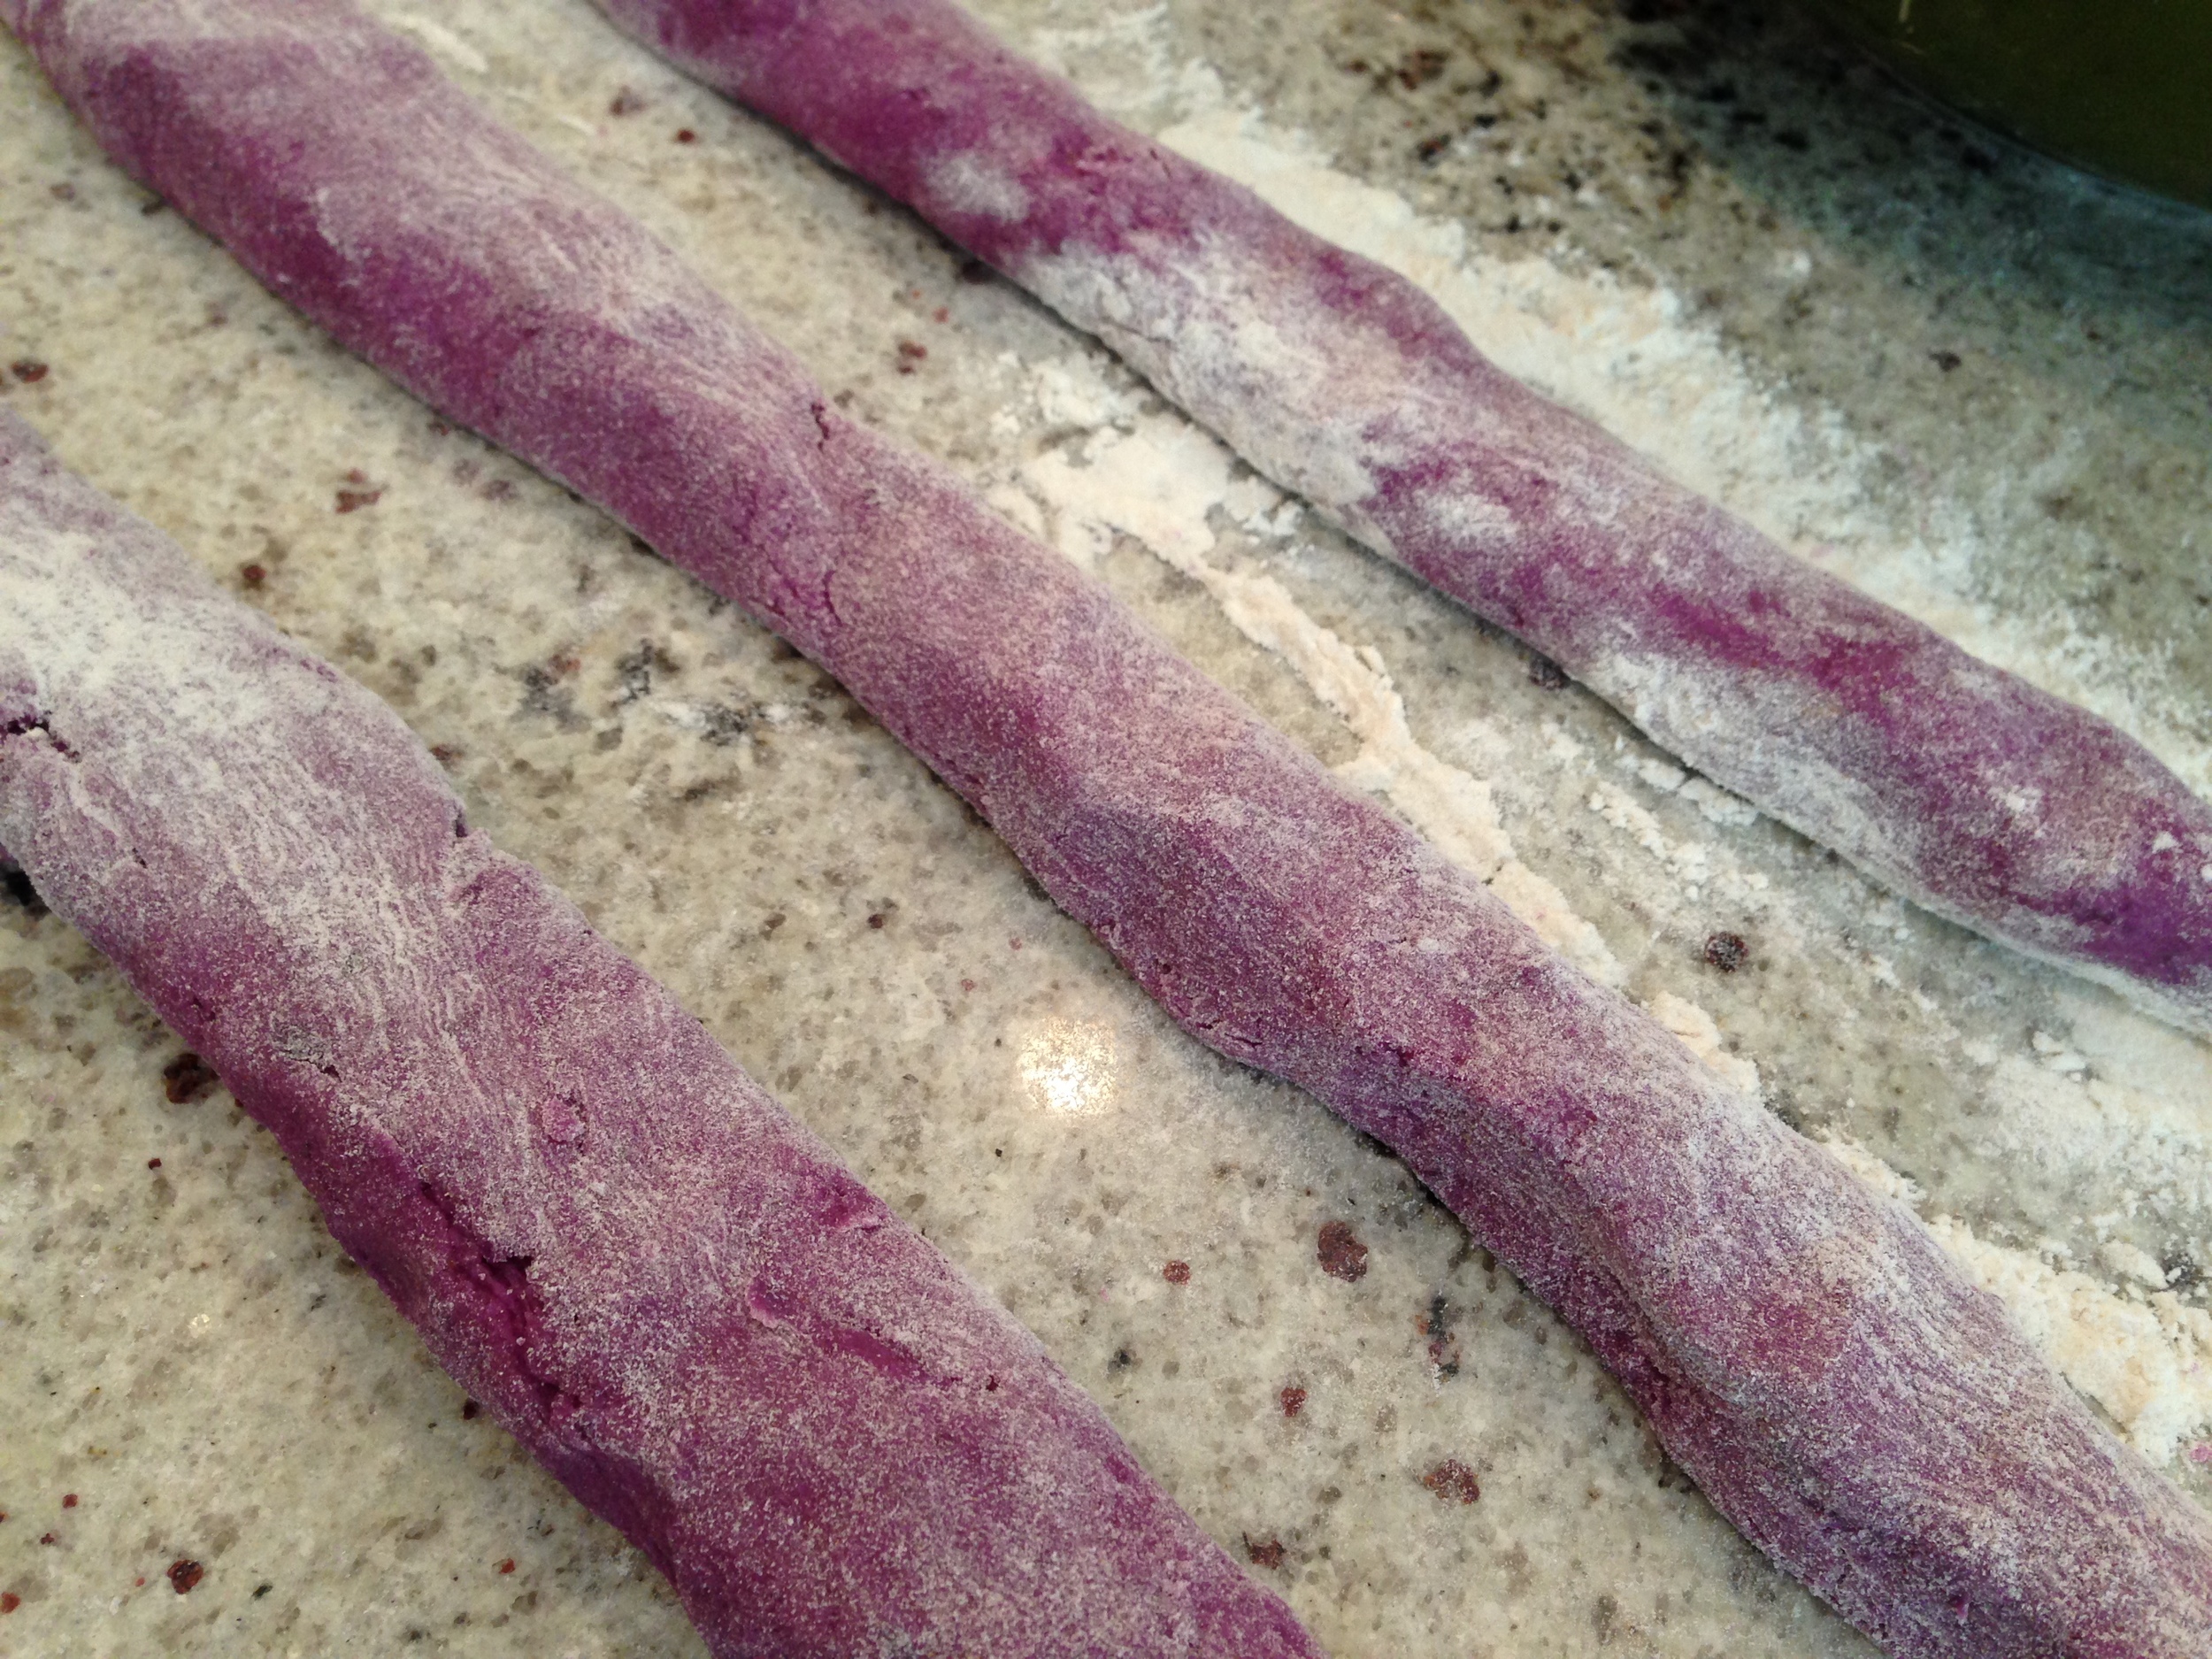
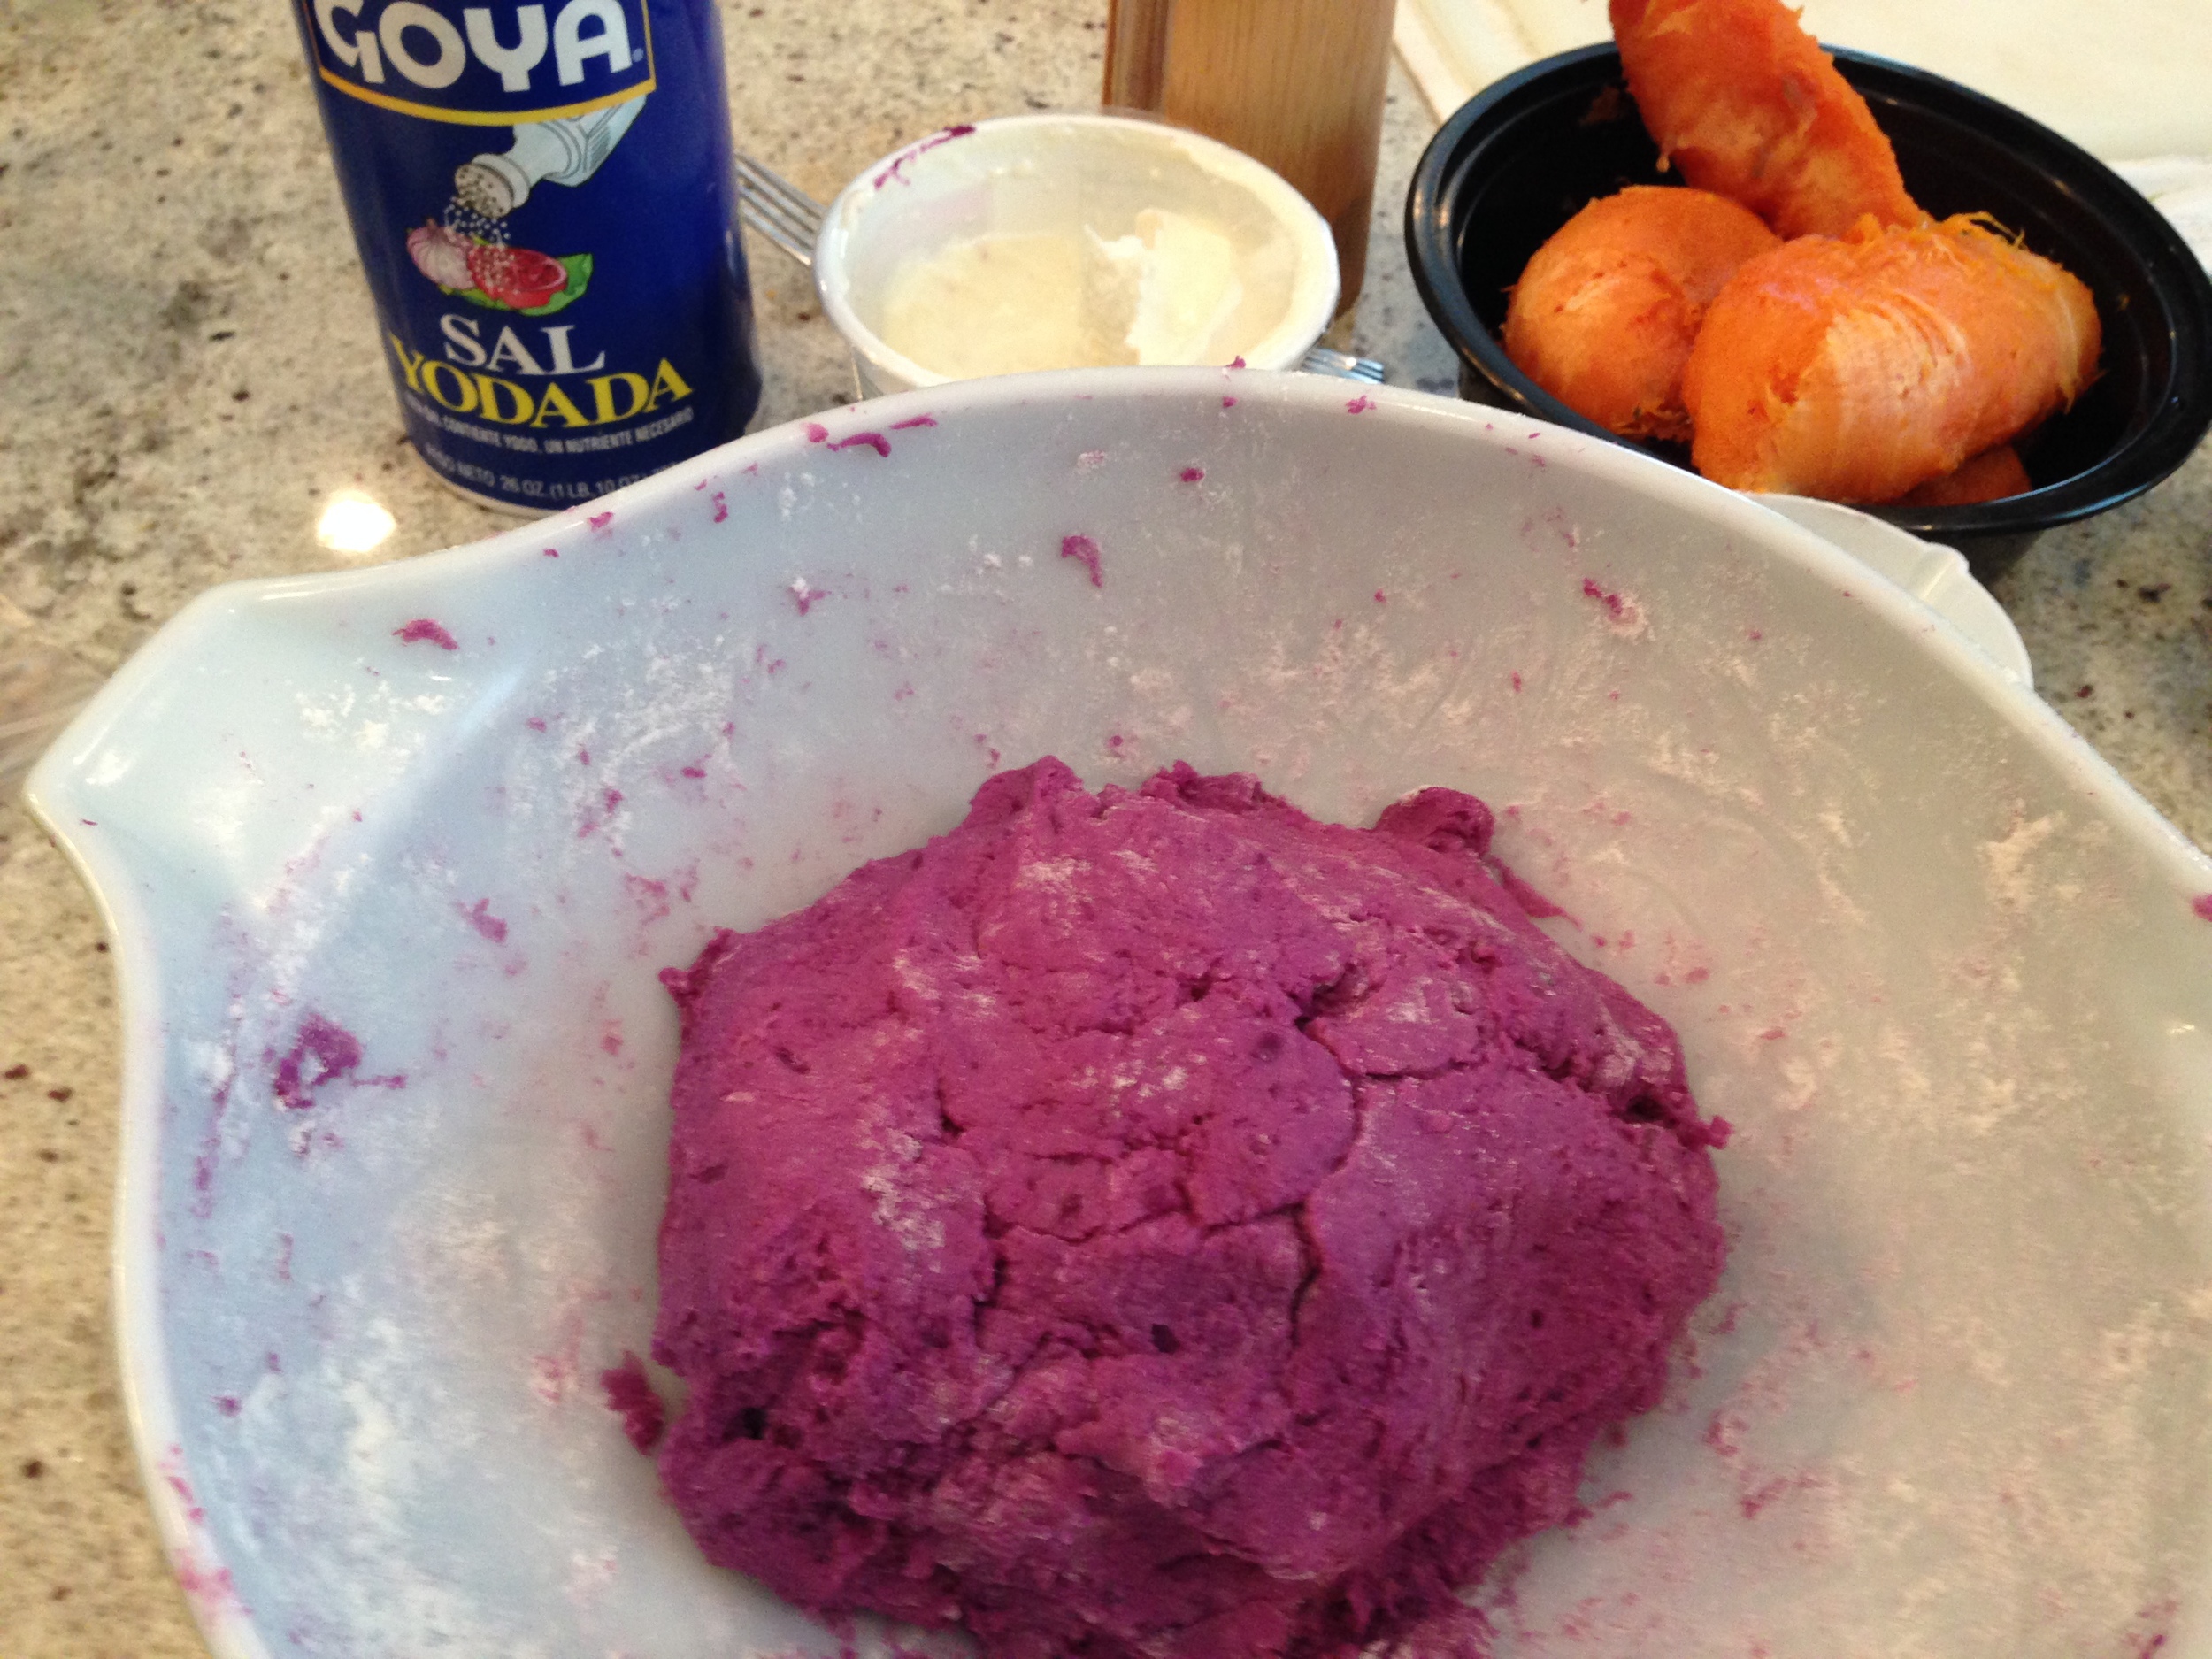
I came across the Hawaiian sweet potato many years ago while in Hawaii. I first saw it incorporated into a pie when I went to a lunch at my grandparent's retirement home in Hawaii Kai. They had staked out their usual table in the dining area near the lanai (where there's a breeze and enough room to put my grandma's walker) and I had a clear view of the cart rolling out of the kitchen with the soft purple hued pies - all sliced and ready to be served to the residents. 

I still remember seeing the slices of pie being pushed on the cart from table to table and all the seniors being so blasé towards this spectacular color (on a pie!)...but for me...I have since been dreaming of all the different ways I can incorporate purple onto my plate. 

Many years ago, I found frozen ube (Filipino purple sweet yam) at Sun Foods in Brooklyn Center, MN. I had mixed the ube with heavy whipping cream and sugar into a mousse as a cupcake filling. It was a surprise to those who ate it and found the sweet lavender colored cream in the middle!

This week at Central Market in Houston, TX I found Hawaiian sweet potatoes for $1.98 per pound. I have been meaning to make these soft lavender gnocchi (just for a visual treat!), but knew that if I wanted to embark on this journey that I would have to dedicate a whole afternoon to this endeavor and make a huge batch so it's worth my while. So, armed with my verde green Pyrex Cinderlla mixing bowl (#444) and a bit of determination...I finally did it!

dough
dough rope

I loved seeing the colors of purple change during the entire process - right from when you pierce the sweet potato with a fork till when you sprinkle the final little bit of flour to keep the gnocchi rope from sticking to the surface. Very reminiscent of the Hawaiian sunset. The second sunset that is, as a dear friend of mine put it - the one after the sun actually sets - when you can see the colors of the clouds changing from orange to a medley of pink, blue and purple.

I don't know when I'll be back in Hawaii again to wander around the the farmer's market on Keeaumoku and simultaneously have access to a kitchen with all the right utensils for this kind of project. In the meantime, I'll be day dreaming about the sun and as I head into the heart of the Midwestern winter, I'll defrost some of the gnocchi I hid in the freezer for a quiet evening meal. My way of sneaking the aloha into a cold, but Hawaiian, Minnesota night. 

cut dough
gnocchi

Hawaiian Sweet Potato Gnocchi with Butter Sage Sauce

  • 2 pounds of Hawaiian Sweet Potato
  • 2 TBSP of creamed honey (or a sugar of your choice)
  • 8 ounces of ricotta cheese
  • 2 1/4 cup of flour (approximate)
  • 2 tsp salt
  • 1/2 tsp freshly ground nutmeg

For the Sauce

  • 1 stick of butter
  • salt and pepper to taste
  • 1 tsp cinnamon
  • 6-10 sage leaves, chopped

Line large baking sheet with aluminum foil. Pierce sweet potatoes with a fork and then set on the baking sheet; bake at 350°F for about 50 minutes. Cut in half and cool. Scrape sweet potato flesh into medium bowl and mash; transfer 3 cups to large bowl. Add ricotta cheese; blend well. Add creamed honey, 2 tsp salt, and nutmeg; mash to blend. Mix in flour, about 1/2 cup at a time, until soft dough forms.

Turn dough out onto floured surface; divide into dough chunks. Form each chunk into a long rope (about 1 inch in diameter), sprinkling with flour as needed if it sticks to the surface. Cut each rope into one inch pieces. Indent each piece with the twines of a fork. 

Bring large pot of water to boil; add 2 tablespoons salt and return to boil. Working in batches, boil gnocchi until tender, about 6 minutes. Transfer gnocchi to clean baking sheet lined with parchment paper. Cool completely. 

For the sauce, melt butter in heavy large saucepan over medium-high heat. Cook until butter solids are golden brown, stir pan occasionally, about 5 minutes.

Add chopped sage and cinnamon (mixture will zizzle). Turn off heat. Add salt and pepper to taste.

Transfer some sage butter into a pourable container. Add half of gnocchi into the pan. Sauté until gnocchi are heated through, about 6 minutes. Repeat with remaining sage butter and gnocchi.


December 19, 2014 /V
Pyrex, Recipes, #444, Pyrex Verde Cinderella Bowl
2 Comments

Powered by Squarespace